Home Blog Page 38

How Do You Maintain Consistent Branding in Emails?

Introduction

In the crowded world of digital marketing, your brand is more than just a logo or a color scheme—it’s the voice, tone, style, and emotional connection that your audience associates with you. Among the many communication channels available, email marketing remains one of the most powerful tools for nurturing leads, building relationships, and converting followers into loyal customers or subscribers.

However, to make the most of email marketing, it’s crucial to maintain consistent branding across all your emails. Whether you send a welcome email, a newsletter, a product update, or a thank-you message, your audience should immediately recognize it as coming from you.

Inconsistent branding leads to confusion, a loss of trust, and decreased engagement. On the other hand, consistent branding reinforces your identity, builds credibility, and strengthens the emotional connection with your audience.

In this article, we will explore:

  • What email branding is

  • Why consistency matters in email branding

  • Key elements of email branding

  • Strategies to maintain brand consistency

  • Tools that can help

  • A real-life example of consistent branding in email marketing


1. What Is Email Branding?

Email branding refers to the deliberate use of your brand’s visual identity, tone of voice, and messaging style in every email communication you send. It ensures your subscribers can recognize your emails instantly and associate them with your unique brand experience.

Branding in emails is not limited to a logo or header. It includes a wide range of elements such as:

  • Design (colors, fonts, layout)

  • Language and tone

  • Email structure and formatting

  • Sender name and reply-to email

  • Consistency in timing and content style


2. Why Is Consistent Email Branding Important?

Here’s why consistent branding across your emails is essential:


✅ A. Brand Recognition

A strong brand identity helps your audience instantly recognize your emails in a crowded inbox. Consistent use of visual and textual elements creates familiarity and trust.


✅ B. Professionalism and Credibility

Uniform branding conveys professionalism. It tells your subscribers that you are organized, detail-oriented, and serious about your work.


✅ C. Improved User Experience

Subscribers don’t have to guess who the sender is or what to expect. This predictability improves readability and engagement.


✅ D. Higher Open and Click Rates

Consistent branding can increase open and click-through rates, as users are more likely to open emails they recognize and trust.


✅ E. Stronger Emotional Connection

Consistency fosters emotional connection and loyalty. Over time, your audience begins to associate your branding with specific values, solutions, or experiences.


3. Key Elements of Email Branding

To maintain consistent branding, focus on the following elements:


🖼️ A. Visual Identity

  • Logo: Place it prominently in the header or footer.

  • Colors: Use your brand’s color palette. Maintain uniformity in headers, buttons, backgrounds, and highlights.

  • Fonts: Stick to 1–2 brand fonts. Use web-safe fonts like Arial, Helvetica, or Georgia if needed.

  • Images: Use branded illustrations or photography styles. Avoid random stock photos.

  • Layout: Keep your email structure uniform (e.g., header, body, CTA, footer).


🗣️ B. Tone and Voice

  • Define your brand voice (e.g., friendly, formal, witty, inspirational).

  • Use a consistent writing style across emails—sentence length, emojis, contractions, vocabulary.

  • Stick to your audience’s reading level and expectations.


🧭 C. Email Structure and Format

  • Subject Line Style: Whether you use emojis, sentence case, or curiosity-driven titles, keep it consistent.

  • CTA Buttons: Use similar wording and design for calls-to-action.

  • Footer: Include consistent contact information, unsubscribe links, and social media icons.


📬 D. Sender Name and Email Address

  • Use the same “From” name and email address for all communications.

  • This ensures recipients recognize your emails and trust the source.


📅 E. Frequency and Timing

  • Stick to a regular schedule (e.g., every Tuesday at 10 a.m.).

  • This creates predictability and sets subscriber expectations.


4. Strategies to Maintain Consistent Branding in Emails

Here are step-by-step strategies to ensure brand consistency in your emails:


✅ 1. Create a Brand Style Guide for Emails

Develop a branding guide that outlines:

  • Logo usage

  • Color codes (Hex or RGB)

  • Font names and sizes

  • Tone of voice examples

  • Approved CTA formats

  • Signature format

This document should be accessible to everyone who creates or sends emails in your organization.


✅ 2. Use Email Templates

Instead of starting from scratch each time, create reusable email templates that match your brand guidelines. This ensures:

  • Consistent layout and design

  • Time saved in email creation

  • Reduced risk of inconsistency

Most email platforms like Mailchimp, ConvertKit, or Brevo allow you to create and save branded templates.


✅ 3. Segment and Customize While Staying On-Brand

If you’re customizing emails based on audience segments (e.g., new subscribers vs. returning customers), make sure you adapt your content without losing your core branding.

For example:

  • Keep the design and tone consistent, even if the message changes.

  • Avoid sudden shifts in personality or layout.


✅ 4. Train Your Team

If multiple people are involved in your email marketing, make sure they understand your branding guidelines. Conduct short training sessions or provide tutorials on using the brand kit and templates.


✅ 5. Conduct Brand Audits

Regularly review your sent emails to check for branding consistency. Look for:

  • Color mismatches

  • Off-brand language

  • Incorrect logo placements

  • Missing brand elements

Tweak your email strategy as needed.


✅ 6. Use Consistent Signature and Footer

Your signature (if included) and email footer should reflect your brand consistently. Include:

  • Your name and role (if relevant)

  • Logo or brand tagline

  • Website and social links

  • Unsubscribe link


5. Real-World Example: Consistent Email Branding

Let’s look at an example to understand how this works in practice.


Scenario:

Simran, a university student, runs a weekly newsletter called “StudyWithSimran”, offering tips on productivity, study hacks, and mental wellness.


Brand Identity:

  • Logo: A pencil and book icon in pastel shades

  • Color Palette: Soft purple, white, and dark blue

  • Font: Montserrat for headers, Arial for body

  • Tone: Friendly, motivating, and encouraging

  • Layout: Always begins with a quote, followed by 3 short tips, ends with a motivational CTA


Sample Email Format:

Subject Line: “📚 3 Study Hacks for a More Focused Week”

Header:

  • Logo in the top-left

  • Date of the email

Body:

  • “This week’s quote: ‘Discipline is choosing between what you want now and what you want most.’ – Abraham Lincoln”

  • Tip #1: Use the Pomodoro method (with link to free timer)

  • Tip #2: Start your day with a to-do list

  • Tip #3: Avoid multitasking—focus on one task at a time

CTA Button: “🎯 Download This Week’s Study Tracker”

Footer:

  • “You’re receiving this because you subscribed to StudyWithSimran”

  • Website link

  • Instagram, YouTube icons

  • Unsubscribe option


Result:

  • 45% average open rate

  • 22% click-through rate

  • Over 80% subscriber retention after 6 months

Simran’s subscribers appreciate the predictable, high-value content and her signature branding, making them look forward to each week’s message.


6. Tools to Help Maintain Consistent Branding

Tool Use
Canva Pro Create branded email graphics and templates
Mailchimp Save and reuse email templates
ConvertKit Design and automate branded sequences
Brandfolder Manage and share branding assets
Litmus Test email design and consistency across devices

7. Common Mistakes to Avoid

Mistake Why It’s Harmful
❌ Using random fonts or colors Breaks visual identity and looks unprofessional
❌ Changing sender name frequently Reduces recognizability and trust
❌ Mixing tones (formal in one, casual in another) Confuses the reader and weakens your voice
❌ Inconsistent layout across emails Causes cognitive overload and reduces readability

Conclusion

Maintaining consistent branding in your emails is not just a cosmetic detail—it’s a strategic decision that influences your audience’s trust, recognition, and engagement. Every element, from colors and logos to tone and timing, contributes to the experience your subscribers associate with your brand.

When done well, email branding acts like a digital signature, leaving a lasting impression with every message you send. Whether you’re a student running a newsletter, a content creator, or a business, building and maintaining a strong email brand helps you stay memorable, credible, and effective in the inbox.


✅ Final Checklist: Email Branding Consistency

Item Check
🖼️ Visual elements match your website and social media
🗣️ Consistent tone and voice across emails
📧 Same sender name and reply-to email
💻 Templates used for layout consistency
🧾 Branding guide created for team or yourself
📅 Emails sent at regular intervals
🔍 Regular branding audits done

Want a free branded email template or checklist? Let me know your brand name and niche, and I can create one tailored to your style!
What Are Email Series, and How Can They Be Used for Education?

Introduction

In a world saturated with information, capturing and retaining attention is one of the biggest challenges for educators, content creators, and digital marketers alike. Whether you’re a teacher, a student blogger, a course creator, or an affiliate marketer promoting educational products, your ability to deliver structured learning content in a way that feels natural, accessible, and engaging is key to success.

Enter the email series—a simple yet powerful method to distribute educational content over time. When used strategically, an email series becomes more than just a delivery method; it transforms into a guided learning journey that helps your audience absorb information in manageable steps.

This article will explore:

  • What email series are

  • Different types of educational email series

  • Why they work so well for teaching

  • How to create an effective educational email series

  • Best practices to maximize impact

  • A real-life example


1. What Is an Email Series?

An email series—also called an email sequence, autoresponder series, or drip campaign—is a set of pre-written emails sent to subscribers automatically at specific intervals or in response to user actions.

Instead of sending one email at a time, an email series delivers a sequence of emails in a structured order over days, weeks, or even months. Each email builds on the last, creating a progressive experience.


🎯 Key Characteristics of an Email Series:

  • Pre-scheduled or triggered by user behavior

  • Delivered in a specific order

  • Automated using email marketing platforms (like Mailchimp, ConvertKit, Brevo, or ActiveCampaign)

  • Often designed with a single goal in mind—education, onboarding, engagement, or conversion


2. Types of Email Series Used in Education

Let’s explore some of the most common types of educational email series:


✅ A. Mini-Courses or Email Courses

This is the most popular educational format.

Structure:

  • 5 to 10 lessons delivered over a set period (e.g., 1 per day)

  • Each email focuses on one concept or module

Use Case:

  • Teaching a skill (e.g., “Learn Graphic Design in 7 Days”)

  • Educating potential customers about a product (e.g., “How to Use Our App for Maximum Productivity”)


✅ B. Welcome and Orientation Series

Aimed at new subscribers, this series provides foundational knowledge about your content, teaching style, or product.

Structure:

  • Overview of what to expect

  • Introduction to main topics or features

  • First learning resources shared

Use Case:

  • Welcoming students to a course

  • Introducing a study plan or blog theme


✅ C. Onboarding Series for Tools or Platforms

Designed to teach users how to use software, digital tools, or platforms effectively.

Structure:

  • Step-by-step tutorials

  • Best practices and hidden tips

  • User case studies

Use Case:

  • Teaching students to use Google Docs, Canva, or Notion


✅ D. Weekly Lesson Series or Newsletters

Regular educational content delivered weekly.

Structure:

  • Each email is standalone but part of a broader theme

  • Consistent format and tone

Use Case:

  • “Study Tip Tuesday”

  • “Weekly Language Lesson”


✅ E. Challenge or Workshop Series

A short-term intensive email series built around a learning goal or habit.

Structure:

  • Daily tasks or lessons

  • Encouragement and accountability

Use Case:

  • “5-Day Writing Challenge for Beginners”

  • “7-Day Morning Routine Reset”


3. Why Email Series Work So Well for Education


🎓 A. Progressive Learning

Breaking information into smaller, digestible lessons sent over time mirrors the way people learn best—step by step. This avoids overwhelming learners and increases retention.


⏳ B. Spaced Repetition

Learning science supports the idea of spaced repetition—revisiting concepts at spaced intervals to improve memory. Email series naturally incorporate this.


💬 C. Builds Trust and Connection

Each email is an opportunity to build a relationship. Learners begin to trust your voice, teaching style, and advice.


🧠 D. Better Engagement and Retention

Subscribers who receive regular value from your email series are more likely to stay subscribed, engage with your content, and share it with others.


📊 E. Trackable and Adaptable

You can measure:

  • Open and click-through rates

  • Drop-off points

  • Feedback and replies

This helps refine your content and teaching approach.


4. How to Create an Effective Educational Email Series

Here’s a step-by-step guide:


✅ Step 1: Define Your Learning Objective

Ask yourself:

  • What do I want the subscriber to learn or achieve by the end?

  • Is this series for beginners or advanced learners?

  • What problem am I solving?

Example:
“I want to help college students create a personalized study routine in 7 days.”


✅ Step 2: Outline the Series Structure

Break your topic into key lessons or themes.

Example (7-Day Email Course: Create Your Perfect Study Routine):

  1. Welcome & What You’ll Learn

  2. Understanding Your Learning Style

  3. Time Blocking Techniques

  4. Choosing the Right Study Environment

  5. Daily Review Strategy

  6. Digital Tools for Planning

  7. Final Planner + Bonus Templates


✅ Step 3: Write Each Email with a Clear Focus

Each email should:

  • Start with a greeting and brief introduction

  • Teach one core idea

  • Include a practical takeaway or action

  • End with a teaser for the next email


✅ Step 4: Automate Delivery

Use your email platform’s automation feature to:

  • Set intervals (daily, every 2 days, etc.)

  • Trigger the series after signup or download

  • Personalize with subscriber names and interests


✅ Step 5: Add a Call-to-Action (CTA)

Encourage engagement:

  • “Reply with your biggest challenge”

  • “Download this worksheet”

  • “Click to access bonus material”


✅ Step 6: Test and Improve

After launch, track metrics:

  • Are emails being opened?

  • Which lessons get the most clicks or replies?

  • Where do people drop off?

Use insights to improve future series.


5. Best Practices for Educational Email Series

Tip Why It Matters
🧩 Keep it modular Each email should stand alone, in case a subscriber misses one
✍️ Write conversationally Makes learning feel human and friendly
📷 Use visuals or downloads PDF guides, checklists, or videos add value
⏱ Keep it short 300–500 words per email is often ideal
📬 Consistent timing Send emails at the same time daily or weekly
🔁 Include summaries or recaps Reinforces learning

6. Real-Life Example: Educational Email Series for Students

Creator: Aditya, a student and productivity blogger

Offer: Free 5-Day Email Course — “Beat Procrastination and Study Smarter”


Email 1: Welcome & Mindset Shift

  • Subject: “Welcome to the Study Smarter Challenge 🎓”

  • Teaches: Why procrastination happens

  • CTA: Reply with your biggest study struggle


Email 2: Set Your Study Goals

  • Subject: “Step 1: Know Where You’re Going 🎯”

  • Teaches: SMART goals and how to set them

  • Resource: Goal-setting worksheet


Email 3: Time Management Tools

  • Subject: “The Only 3 Tools You Need to Beat the Clock ⏰”

  • Teaches: Pomodoro technique, Eisenhower Matrix

  • CTA: Download the study timer app


Email 4: Creating Your Study Environment

  • Subject: “Your Brain’s Favorite Place to Focus 🧠”

  • Teaches: Ideal study setups and common distractions

  • Bonus: Desk setup checklist


Email 5: Final Plan & Encouragement

  • Subject: “Your 7-Day Study Blueprint Is Ready! 💪”

  • Recap: All strategies + planner template

  • CTA: Share your results on social media


Results:

  • 42% average open rate

  • 1,100 new subscribers

  • 250+ planner downloads

  • 50+ replies with personal stories


7. Benefits of Using Email Series for Education

Benefit Explanation
📚 Structured Learning Organizes knowledge in progressive steps
🔁 Reinforcement Repetition improves memory and understanding
🤝 Community Building Responses and engagement foster relationships
⏳ Long-Term Engagement Keeps subscribers active and involved
💼 Scalable Teaching Teach once, deliver to thousands with automation
💰 Monetization Opportunities Sell courses, ebooks, or tools after value delivery

Conclusion

Email series are a high-impact, low-cost way to educate, inspire, and engage your audience over time. Whether you’re teaching study strategies, productivity skills, coding, art, or financial literacy, delivering your lessons through a carefully crafted email sequence allows you to reach learners in a personal, accessible, and organized format.

By combining solid instructional design with smart email marketing, you turn subscribers into students—and students into loyal followers or customers.


✅ Final Checklist: Educational Email Series

Task Complete?
🎯 Defined your learning objective
🧠 Outlined each email’s topic
✍️ Wrote emails in a conversational tone
📬 Automated the series delivery
📈 Monitored open and engagement rates
🔁 Improved based on data

Need help designing a 5-day educational email series for your topic or audience? Just share your niche or subject area, and I’ll help you outline the full sequence!

What are sitelink extensions?

Introduction

In the dynamic world of digital advertising, especially on platforms like Google Ads, marketers are constantly seeking ways to enhance their ad visibility and effectiveness. One of the most impactful and often underutilized features is the Sitelink Extension. Sitelink extensions allow advertisers to add additional clickable links to their search ads, directing users to specific pages within their website. These extensions play a crucial role in improving user experience, click-through rates (CTR), and ultimately conversions.

For a leading fashion e-commerce brand like Myntra, sitelink extensions can offer users direct paths to trending products, ongoing sales, or specific clothing categories like “Men’s Casual Shirts,” “Women’s Ethnic Wear,” or “Footwear Deals.” This improves navigation and relevance, giving shoppers a quicker way to reach what they’re looking for.

This article explores everything you need to know about sitelink extensions, how they work, why they’re important, and how brands like Myntra can use them effectively to drive better advertising results.

What Are Sitelink Extensions?

Sitelink extensions are a type of ad extension in Google Ads that allow advertisers to add extra links below the main ad headline. Each sitelink leads to a different page of your website and is displayed alongside your search ad to help users navigate directly to the most relevant content.

Each sitelink includes:

  • A clickable headline (link)

  • An optional two-line description for each sitelink (available on desktop)

  • A destination URL that takes users directly to the page referenced

Unlike the main headline, which typically links to your homepage or a specific landing page, sitelinks give users more options and increase the area your ad occupies on the search engine results page (SERP).

For example, if a user searches “Myntra online shopping,” instead of just showing a single homepage link, a sitelink extension can also show:

  • Men’s Collection

  • Women’s Ethnic Wear

  • End of Season Sale

  • Order Tracking

This not only boosts visibility but also drives more relevant traffic to specific product or promotional pages.

Benefits of Using Sitelink Extensions

1. Enhanced Visibility and Real Estate
Sitelink extensions make your ad physically larger on the search results page. More space generally means better visibility, higher trust, and more chances to grab the user’s attention.

2. Increased Click-Through Rates (CTR)
With more relevant options visible to users, the likelihood of a click improves. In many cases, sitelinks have been shown to increase CTR by 10–20%.

3. Direct Navigation to Conversion Pages
Instead of users landing on a general homepage, sitelinks let them go directly to the product category or service they’re interested in. This reduces bounce rate and improves conversion likelihood.

4. Better User Experience
Sitelinks help users reach what they’re searching for faster. For example, if a user is specifically looking for “Myntra shoes,” a sitelink labeled “Footwear Collection” is far more helpful than a generic landing page.

5. Supports Seasonal Promotions or Flash Sales
You can add or update sitelinks based on ongoing events like “Diwali Sale,” “End of Season Sale,” or “Limited Time Offers,” which keeps your ads timely and compelling.

6. More Insights
Google Ads reports clicks on each sitelink individually. This helps advertisers understand which product categories or promotions are attracting the most interest.

How Sitelink Extensions Work

Sitelinks appear underneath your ad’s main text in both desktop and mobile formats. On desktop, sitelinks can display with optional descriptions—creating what looks like a mini sitemap under your ad. On mobile, up to 8 sitelinks may appear in a scrolling carousel format, while desktops typically show 2 to 6 sitelinks depending on screen size and ad rank.

Google automatically decides when and how many sitelinks to show based on:

  • Ad Rank: Higher quality scores and bids increase the chances.

  • Device Type: Desktop allows more space, so more sitelinks can be shown.

  • Performance: Google may prioritize higher-performing sitelinks.

Each sitelink is clickable and takes the user directly to the corresponding webpage.

Example: Sitelink Extensions for Myntra

Let’s say you’re running a Google Ads campaign for Myntra to promote general online shopping and fashion categories. Here’s how you might structure your sitelink extensions:

Main Ad Headline:
Shop Fashion Online at Myntra – Upto 70% Off + Extra Offers

Sitelink Extensions:

1. Men’s Clothing Collection
Explore trendy shirts, jeans, jackets & more
www.myntra.com/men

2. Women’s Ethnic Wear
Kurtas, sarees, lehengas for every occasion
www.myntra.com/women-ethnic

3. Footwear Deals
Shop sports shoes, sneakers, heels & more
www.myntra.com/footwear

4. Track Your Order
Quickly check delivery status & history
www.myntra.com/trackorder

5. End of Season Sale
Get up to 70% off – Limited time only
www.myntra.com/sale

6. New Arrivals
Fresh styles for men & women – updated daily
www.myntra.com/new-arrivals

Each of these sitelinks can be configured to show additional descriptions (especially useful on desktop), making the ad more detailed and user-friendly.

Best Practices for Using Sitelink Extensions

1. Link to High-Performing Pages
Choose pages that users frequently visit or convert well, such as sales pages, category pages, or product ranges.

2. Use Clear and Specific Labels
Your sitelink text should be concise, descriptive, and actionable. Avoid vague terms like “Click Here” and use phrases like “Shop Men’s Shoes” or “View Winter Jackets.”

3. Optimize Landing Pages
Each sitelink should lead to a highly relevant landing page. If someone clicks on “Ethnic Wear,” they shouldn’t end up on a generic fashion page.

4. Match Intent
Align sitelinks with the user’s search intent. If the ad is targeting “Myntra winter sale,” relevant sitelinks might include “Winter Jackets,” “Thermal Wear,” or “Woolen Sweaters.”

5. Utilize Description Lines
For desktop users, sitelinks with additional descriptions perform better. Include 1–2 short lines describing what the user will find on that page.

6. Keep Testing
Monitor individual sitelink performance and adjust accordingly. Swap out underperforming links with new ones.

7. Update for Seasonal Campaigns
Use promotional sitelinks during major sales like Big Billion Days, Diwali, Christmas, or End of Season sales, then rotate them afterward.

8. Don’t Repeat Links
Ensure all sitelinks lead to different URLs. Google won’t show multiple links that point to the same destination.

Where and How to Add Sitelink Extensions

You can add sitelink extensions at the:

  • Account level (apply to all campaigns)

  • Campaign level (apply to a specific campaign)

  • Ad group level (for even more precise targeting)

To create them:

  1. Log in to your Google Ads account.

  2. Go to the Ads & Extensions tab.

  3. Select Extensions → Click the blue “+” button.

  4. Choose Sitelink Extension.

  5. Enter the sitelink text, URLs, optional descriptions.

  6. Choose where to apply them (account, campaign, or ad group).

Google will then review the sitelinks before they begin showing with your ads.

Performance Tracking and Optimization

Google Ads allows you to track the performance of sitelinks by:

  • Clicks per sitelink

  • Impressions

  • CTR

  • Conversions (if tracking is set)

These metrics help you refine and optimize sitelink usage. For example, if “Footwear Deals” is getting double the clicks compared to “New Arrivals,” you might elevate it to a higher priority or even create a dedicated ad group for it.

Common Mistakes to Avoid

  • Using too few sitelinks (you should aim for at least 4–6)

  • Linking all sitelinks to the homepage

  • Ignoring mobile vs desktop performance

  • Not customizing sitelinks by campaign type

  • Forgetting to update expired or seasonal sitelinks

Conclusion

Sitelink extensions are a powerful yet simple way to enhance your Google Ads performance. They provide users with more choices, better navigation, and a richer ad experience. For a major fashion retailer like Myntra, sitelinks can lead users straight to high-conversion pages like sales, product categories, and support—all from a single search ad.

When done correctly, sitelink extensions boost visibility, improve click-through rates, and contribute to better conversion performance. They help transform a basic search ad into a fully featured, high-impact shopping experience. As part of a complete Google Ads strategy, sitelink extensions are not just an add-on—they are a competitive advantage.

How Do Emojis and Personalization Affect Open Rates?

Introduction

In the ever-evolving world of email marketing, grabbing attention has never been more difficult—or more important. With inboxes flooded by promotional content, newsletters, updates, and spam, marketers and content creators must find ways to stand out. One of the most effective and increasingly popular strategies involves emojis and personalization, especially in subject lines.

But do these tactics actually work? Can adding a 👋 or including a subscriber’s first name really impact whether your email is opened or ignored?

The short answer is yes—when used correctly.

This article explores:

  • What emojis and personalization are in the context of email marketing

  • How each tactic works to influence open rates

  • The psychological and behavioral principles behind them

  • Data and statistics supporting their effectiveness

  • Best practices for using them

  • A real-life example that ties it all together


1. What Is an Open Rate?

Before diving into tactics, it’s essential to understand what an open rate is.

Open rate is the percentage of recipients who open an email campaign out of the total number of emails delivered.

Formula:
(Emails opened ÷ Emails delivered) × 100

Open rate is a primary metric that determines email engagement, indicating how compelling your subject line and sender name are.

High open rates often lead to:

  • Higher click-through rates

  • Better sender reputation

  • Improved deliverability

  • Increased conversions

So, anything that enhances your subject line’s appeal—like emojis or personalization—can boost the performance of the entire campaign.


2. What Is Personalization in Email Marketing?

Personalization refers to tailoring the email experience to individual subscribers based on data like:

  • Name

  • Location

  • Past purchases

  • Browsing behavior

  • Time of engagement

  • Preferences

In subject lines, personalization often means:

  • Adding the subscriber’s first name

  • Mentioning a recent activity

  • Highlighting a relevant interest

Examples:

  • “Riya, your study plan is ready 🎯”

  • “Don’t forget your discount on planners, Amaan”

  • “Here’s a tip based on your last download”


3. What Are Emojis in Email Subject Lines?

Emojis are visual symbols (😊, 🚀, 💡, 🎁) added to subject lines or body content to express emotion, tone, or emphasis.

In subject lines, they can:

  • Catch the reader’s eye

  • Convey emotion or urgency

  • Create visual breaks in long text

  • Align with seasonal events or themes

Examples:

  • “Your new planner is here 🎉”

  • “Last chance! 50% off ends tonight ⏰”

  • “Feeling overwhelmed? Here’s help 🧘‍♀️”


4. How Personalization Increases Open Rates

Let’s explore the psychological mechanisms behind personalization and why it works.


✅ A. Grabs Attention with Familiarity

People are hardwired to respond to their own name. Seeing it in a subject line draws attention in a sea of generic messages.

Example:
“Hey Priya, we noticed you love productivity tools!”

This creates a feeling of familiarity and intimacy, prompting readers to open the email.


✅ B. Creates Relevance

Personalization implies the email contains information tailored to the recipient. When users feel that the content is meant specifically for them, they are more likely to engage.

“We saw you downloaded the study tracker—here’s how to use it better.”

This makes readers curious and eager to learn more.


✅ C. Builds Trust and Loyalty

When users see that you remember their preferences or habits, it builds a stronger relationship.

“You’ve been with us for 6 months! Here’s a thank-you gift 🎁”

These small touches foster loyalty, decreasing unsubscribe rates and increasing open rates over time.


✅ D. Statistical Backing

According to Campaign Monitor:

  • Emails with personalized subject lines are 26% more likely to be opened.

  • Personalized content improves click-through rates by 14% and conversions by 10%.


5. How Emojis Impact Open Rates

Emojis might seem like a fun, decorative addition, but they have a measurable impact.


✅ A. Catch the Eye Quickly

Emails are usually scanned visually before being opened. Emojis provide a visual break from the text, helping your email stand out.

Compare:

  • “Final Hours: Sale ends soon”

  • “⏰ Final Hours: Sale ends soon”

The second example draws the eye immediately.


✅ B. Communicate Emotion and Tone

Text-only subject lines can seem dry or cold. Emojis inject warmth, excitement, urgency, or humor.

Examples:

  • 💡 Idea of the week!

  • 🌱 Let’s grow your skills

  • ❄️ Winter special just for you

Tone matters in whether a subject line resonates or is ignored.


✅ C. Align With Context or Trends

Emojis help tie emails to holidays, seasons, or trends.

🎄 Holiday deals are here
🏫 Back-to-school tips
🔥 Trending this week

Such associations trigger instant relevance.


✅ D. Statistical Evidence

According to research by Experian and Mailjet:

  • Emails with emojis in the subject line had a 56% higher open rate in some cases.

  • Emojis perform best when aligned with audience demographics and content relevance.


6. Combining Emojis and Personalization

When combined thoughtfully, emojis and personalization can work synergistically to boost open rates.

Example:

“🌟 Amaan, here’s your custom productivity report”

This format:

  • Uses the recipient’s name (personalization)

  • Adds a relevant emoji (eye-catching)

  • Promises value (custom report)

However, overusing either tactic can have the opposite effect. The key is balance and contextual appropriateness.


7. Best Practices for Using Personalization and Emojis

Let’s now cover the do’s and don’ts to use these tools effectively.


✅ Personalization Tips

Do Don’t
Use first name or relevant actions Use incorrect or outdated data
Segment users for deeper personalization Send the same message to everyone
Keep tone friendly and authentic Sound robotic or overly salesy
Personalize both subject and body Personalize only once and ignore context

✅ Emoji Tips

Do Don’t
Test emojis for your audience Overuse emojis (cluttered subject lines)
Use one or two emojis max Use irrelevant or misleading emojis
Align emoji with content Use emojis just for fun if message is serious
Preview emails in inboxes Assume emojis render the same everywhere

📌 Tip: A/B Test Subject Lines

Run A/B tests on your email campaigns:

  • Version A: Subject with personalization only

  • Version B: Subject with emoji only

  • Version C: Subject with both

  • Version D: Generic subject

Track:

  • Open rate

  • Click-through rate

  • Unsubscribes

This data will help fine-tune your strategy.


8. Real-Life Example: Educational Email Campaign with Emojis & Personalization

Scenario:

Sarah runs a blog for college students offering productivity tips and study resources. She grows her email list by offering a free “Study Planner Template.”


Objective:

Boost open rates for her weekly tips newsletter and reduce unsubscribes.


Strategy:

Sarah implements personalization and emojis in her subject lines for a 4-week campaign.


Week 1:

  • Subject: “Riya, here’s a smarter way to plan your week 📅”

  • Open Rate: 41%

Week 2:

  • Subject: “New study hack for you 🎓”

  • Open Rate: 38%

Week 3:

  • Subject: “🔥 Riya, your Monday boost is here!”

  • Open Rate: 44%

Week 4 (No personalization/emojis):

  • Subject: “Weekly study tips and updates”

  • Open Rate: 27%


Outcome:

  • Average open rate increased by 40% over four weeks.

  • 20% more engagement (clicks on planner tools)

  • Unsubscribes dropped by 15%

This showed how small subject line tweaks using personalization and emojis kept readers interested and engaged.


9. Conclusion

Personalization and emojis are not just gimmicks—they are proven tools in email marketing that significantly affect open rates and engagement.

  • Personalization builds familiarity and trust by making emails feel tailor-made.

  • Emojis grab attention, communicate tone, and add a visual edge in crowded inboxes.

  • Together, they can transform your email campaigns from overlooked to irresistible—if used wisely.

Whether you’re a student sending newsletters, a blogger sharing tips, or a business promoting products, understanding how to use emojis and personalization effectively is key to better results.


✅ Final Checklist: Improving Open Rates with Emojis & Personalization

Task Status
Add first names to subject lines and greetings
Use emojis relevant to the message
Limit to 1–2 emojis per subject line
A/B test subject lines
Segment your audience for deeper relevance
Track metrics regularly

Need help writing subject lines for your next campaign? Share your topic and audience, and I’ll craft 5 options with emojis and personalization ready to test!

How Do Educational Emails Help in List Retention?

Introduction

In the digital age, email marketing is a critical tool for engaging audiences, building relationships, and driving conversions. Whether you’re a student blogger, a small business owner, an affiliate marketer, or an educator, one of the most valuable assets you can have is a strong, responsive email list.

However, simply building a list isn’t enough. The real challenge lies in retaining subscribers—keeping them engaged, satisfied, and looking forward to your emails rather than unsubscribing or ignoring them.

This is where educational emails play a pivotal role. Educational emails—those that offer value in the form of insights, tips, lessons, tutorials, or guides—are not just informative; they are strategic tools that significantly improve list retention.

In this article, we will explore what educational emails are, why they matter for retention, the psychological principles that make them effective, how to create them, and how they contribute to long-term engagement. A real-world example will bring these ideas to life.


1. What Are Educational Emails?

Educational emails are email messages that primarily focus on teaching, informing, or offering value through knowledge. Unlike promotional emails that aim to sell, educational emails are about sharing information your audience finds useful.

They might include:

  • Tutorials and how-to guides

  • Step-by-step instructions

  • Tips and strategies

  • Curated educational content

  • Industry insights or news

  • FAQs and troubleshooting guides

  • Mini-courses delivered by email

Educational emails are particularly popular in niches like:

  • Online learning

  • Technology and software

  • Health and wellness

  • Personal development

  • Affiliate marketing

  • Financial literacy

  • Student productivity


2. Why List Retention Matters

Before exploring how educational emails help, it’s important to understand why list retention is critical.

Reason Description
💸 Lower cost Acquiring new subscribers is more expensive than keeping existing ones.
📈 Better performance Engaged subscribers result in higher open and click-through rates.
🧠 Brand trust Loyal subscribers are more likely to convert and advocate for your brand.
📉 Reduce churn Retention reduces unsubscribes and email fatigue.
💬 Higher relevance Regular engagement allows better segmentation and personalization.

When your emails consistently deliver value, subscribers are far less likely to unsubscribe. Educational emails provide that ongoing value, making your emails a welcome presence in the inbox.


3. How Educational Emails Improve List Retention

Let’s dive deeper into the specific ways educational emails keep your subscribers engaged and loyal over time.


✅ A. They Offer Continuous Value

One of the primary reasons people unsubscribe from emails is because they don’t find value in what they’re receiving. Educational emails address this head-on by offering actionable information that:

  • Solves a problem

  • Teaches a skill

  • Saves time or money

  • Helps achieve a goal

When subscribers consistently learn something new or useful from your emails, they begin to see you as a reliable resource.


✅ B. They Establish Authority and Trust

By sharing educational content, you position yourself as a subject matter expert. Whether you’re teaching a student how to improve their study habits or guiding a customer on using a software tool, you become someone they trust.

Trust leads to:

  • Greater loyalty

  • More interactions

  • Higher chances of conversions

Trust also builds your brand’s credibility, making subscribers less likely to opt out.


✅ C. They Increase Engagement

Educational emails often have higher open and click-through rates than promotional emails. That’s because they tend to:

  • Use curiosity-based subject lines

  • Provide in-depth content

  • Include interactive elements (like links to full guides or videos)

This engagement helps email providers (like Gmail or Yahoo) see your emails as valuable, reducing the chances of your messages being marked as spam or ignored.


✅ D. They Enable Nurturing and Progression

Educational emails can form the foundation of email sequences or drip campaigns that guide subscribers through a learning journey.

For example:

  1. Email 1 – Introduction to a topic

  2. Email 2 – Deeper explanation with examples

  3. Email 3 – Tools and resources

  4. Email 4 – Common mistakes to avoid

  5. Email 5 – Case study or success story

This progression keeps readers engaged and coming back for more.


✅ E. They Build a Habit

When subscribers know they’ll receive useful information from you every Tuesday or Friday, it becomes a habit to open your emails.

Educational emails that are consistent in value and timing build positive anticipation—people actually look forward to receiving them.


✅ F. They Support Personalization and Segmentation

When you send educational emails based on what users signed up for or interacted with, it shows that you understand their needs.

Examples:

  • A subscriber who downloads a “Productivity Tips for Students” guide can receive a weekly study tip.

  • Someone who watches a tutorial video can receive follow-up lessons.

This behavior-driven personalization makes content more relevant—and subscribers more loyal.


4. Components of an Effective Educational Email

An educational email should follow a structure that facilitates learning while maintaining interest.


1. Clear Subject Line

Make it benefit-driven or curiosity-based.

Examples:

  • “3 Study Habits That Actually Work (Backed by Science)”

  • “How to Master Focus in Just 10 Minutes a Day”


2. Friendly Introduction

Set the tone and build rapport.

“Hey there! I know how tough it can be to stay organized during exam season. That’s why today’s tip might help you beat the chaos…”


3. Main Educational Content

Use a format that is:

  • Easy to scan (bullets, short paragraphs)

  • Visually appealing (bold text, dividers)

  • Action-oriented (include steps or examples)


4. Practical Takeaway

Help the reader apply what they’ve learned.

“Try using this 25-minute Pomodoro method during your next study session. You’ll be surprised at how much you can get done.”


5. Optional Resource or Link

Include a download, video, blog post, or checklist.


6. CTA (Call to Action)

Encourage continued engagement.

Examples:

  • “Reply and let me know what works best for you.”

  • “Download this printable study tracker.”


5. Real-Life Example: Educational Email Series for Students

Scenario:

Priya, a psychology student and blogger, offers productivity tips and digital tools for university students. She builds her email list by offering a free “Student Planner PDF.”


Email Series: “Study Smart – 5-Day Email Course”

Day 1 – Introduction: Why Most Study Plans Fail

  • Brief psychology of focus

  • 3 common mistakes

  • CTA: Look out for tomorrow’s lesson

Day 2 – Study Environments That Boost Retention

  • How lighting, noise, and posture affect memory

  • Action tip: Create a distraction-free zone

Day 3 – Mastering Time Management

  • The Pomodoro technique explained

  • Tool suggestion: Digital timer app

  • CTA: “Download the timer I use”

Day 4 – Active Recall Techniques

  • Explanation of spaced repetition

  • Link to free flashcard app

Day 5 – Creating Your Personalized Routine

  • Summary of the course

  • Downloadable weekly planner

  • CTA: Share your plan with me!


Results:

  • 45% average open rate

  • 32% click-through rate

  • 600+ new subscribers within 2 months

  • Unsubscribe rate below 2%

Takeaway: Subscribers stayed engaged, completed the sequence, and responded with gratitude. Many converted to premium planner downloads, providing both impact and income.


6. Bonus: Topics for Educational Emails by Niche

Niche Educational Email Topics
Student Productivity Study tips, time management, exam prep
Finance Budgeting, saving, investing basics
Fitness Exercise routines, diet tips, myth-busting
Mental Health Mindfulness, coping techniques, journaling
Affiliate Marketing SEO basics, content ideas, platform guides
Tech Software tutorials, app comparisons, coding hacks

7. Tips for Success with Educational Emails

  • ✅ Keep emails concise but valuable

  • ✅ Use visuals (charts, infographics, examples)

  • ✅ Link to supporting content (videos, PDFs)

  • ✅ Use reader-friendly formatting (headings, bolding)

  • ✅ Encourage replies to build conversation

  • ✅ Stay consistent in timing and tone


8. Common Mistakes to Avoid

Mistake Why It’s Bad
❌ Too much information Overwhelms the reader
❌ No actionable tip Doesn’t lead to a result
❌ Too promotional Feels like a sales pitch, not a lesson
❌ Inconsistent tone or timing Breaks trust and rhythm
❌ No follow-up Misses opportunity to deepen engagement

Conclusion

Educational emails are one of the most powerful tools for list retention in email marketing. They provide ongoing value, establish trust, increase engagement, and build lasting relationships with your audience. By helping subscribers learn and grow, you position yourself not just as a marketer, but as a trusted guide.

Whether you’re a student sharing productivity hacks, a teacher offering lessons, or a business selling digital tools, educational content helps ensure your subscribers stay subscribed, engaged, and excited to receive your emails.


✅ Final Checklist: Educational Emails for List Retention

Component Description
🎓 Value-Based Content Teaches something useful
🔁 Consistency Regular schedule (weekly, biweekly)
📬 Personal Touch Uses name, conversational tone
📊 Track Metrics Monitor open, click, and unsubscribe rates
🧠 Encourage Application Help readers take action
💬 Invite Responses Foster two-way communication
🔗 Link to Resources Offer downloads, videos, or tools

Want a free 5-email educational sequence tailored to your blog or topic? Let me know your niche and audience, and I’ll help you craft one!

A/B Split Tests: Definition, Mechanics, and Impact on Email Marketing

A/B Split Tests: Definition, Mechanics, and Impact on Email Marketing

A/B split testing, often referred to as A/B testing, is a powerful method in email marketing that allows marketers to compare two versions of an email to determine which performs better in achieving specific goals, such as increasing open rates, click-through rates, or conversions. For students, small business owners, or creators with limited resources, A/B testing is an accessible and effective way to optimize email campaigns, ensuring maximum engagement and impact. By systematically testing variations and analyzing data, A/B split tests provide actionable insights that refine email strategies. This essay explores the concept of A/B split tests, how they work, their benefits, challenges, best practices, and provides a practical example tailored to a student context.

What Are A/B Split Tests?

A/B split testing involves creating two versions of an email (Version A and Version B) that differ in one specific element, such as the subject line, call to action (CTA), or design. These versions are sent to separate, randomly selected segments of the email list, and their performance is measured against a predefined metric (e.g., open rate, click-through rate). The version that performs better is then used for the broader audience or informs future campaigns. A/B testing is grounded in the scientific method, using controlled experiments to isolate the impact of a single variable on subscriber behavior.

For example, a student might test two subject lines for a newsletter:

  • Version A: “5 Study Tips for Finals”
  • Version B: “[Name], Ace Your Finals with These Tips”

By sending each version to 20% of their list and measuring open rates, the student can identify which subject line resonates more, then send the winning version to the remaining 60% of subscribers.

A/B testing is supported by most email marketing platforms, including free plans like Mailchimp and MailerLite, making it accessible for students. It focuses on iterative improvements, allowing marketers to refine emails based on data rather than assumptions.

How Do A/B Split Tests Work?

A/B split testing follows a structured process that combines experimentation, data collection, and analysis. Below is a step-by-step explanation tailored for email marketing, with considerations for students:

1. Define the Goal

Start by identifying the objective of the test, aligned with your campaign goals. Common goals include:

  • Increasing Open Rates: Test subject lines or sender names to boost opens (target: 20–30%).
  • Improving Click-Through Rates (CTR): Test CTAs, button designs, or content to drive clicks (target: 5–10%).
  • Boosting Conversions: Test offers or landing pages to increase actions like purchases or signups (target: 2–5%).
  • Reducing Unsubscribes: Test email frequency or tone to maintain engagement (target: <0.5%).

For students, clear goals (e.g., driving blog traffic) simplify testing and align with limited resources.

2. Choose a Single Variable to Test

To isolate the impact of one element, test only one variable at a time. Common variables include:

  • Subject Line: Personalization, length, or tone (e.g., “Free Guide” vs. “[Name], Your Free Guide”).
  • Sender Name: Brand name vs. personal name (e.g., “CodeQuest” vs. “Liam from CodeQuest”).
  • CTA: Wording, placement, or design (e.g., “Download Now” vs. “Get Your Guide”).
  • Content: Layout, images, or text length (e.g., short vs. long email body).
  • Send Time: Morning vs. evening or weekday vs. weekend.
  • Offer: Discount vs. free bonus (e.g., “10% Off” vs. “Free Cheat Sheet”).

Testing one variable ensures clear insights, as multiple changes muddy causality.

3. Segment the Audience

Split your email list into two or more random segments to receive each version. Most platforms automate this process:

  • Sample Size: Test with 10–20% of your list per version (e.g., 100 subscribers each for a 1,000-subscriber list), sending the winner to the rest.
  • Randomization: Ensure segments are comparable to avoid bias (e.g., similar demographics or engagement levels).
  • Segmentation: For advanced testing, target specific groups (e.g., new subscribers vs. engaged users).

Students with small lists (e.g., 200 subscribers) can still test effectively by splitting evenly (e.g., 100 per version).

4. Create Email Variations

Design two versions of the email, differing only in the tested variable. Use your email platform’s editor to:

  • Duplicate the original email.
  • Modify the chosen element (e.g., change the subject line).
  • Ensure all other elements (content, design, timing) remain identical.

For example, a student might create two newsletters identical except for the CTA button color (blue vs. green).

5. Send and Monitor

Send the variations simultaneously (or at the same time on different days for send-time tests) to minimize external variables like time of day. Track performance using:

  • Email Platform Analytics: Mailchimp or MailerLite provide open rates, CTRs, and conversions.
  • Key Metrics: Focus on the metric tied to your goal (e.g., open rate for subject line tests).
  • Test Duration: Allow 24–48 hours for results, depending on list size and response time.

6. Analyze Results

Compare the performance of Version A and Version B to determine the winner. Use statistical significance (most platforms calculate this) to ensure results are reliable:

  • Example: If Version A’s subject line has a 25% open rate and Version B has 30% with 95% confidence, Version B wins.
  • Action: Send the winning version to the remaining list or apply insights to future emails.

7. Iterate and Scale

Use test results to inform future campaigns, then test new variables. Continuous testing builds a data-driven email strategy, improving performance over time.

Benefits of A/B Split Tests

  1. Data-Driven Decisions: Removes guesswork, letting data guide optimizations.
  2. Improved Performance: Boosts open rates by 10–20% and CTRs by 15–25% (Mailchimp, 2024).
  3. Higher ROI: Optimizes conversions, maximizing email marketing’s $36-per-$1 ROI (Litmus, 2024).
  4. Audience Insights: Reveals subscriber preferences (e.g., personalized subject lines work better).
  5. Cost-Effective: Free plans like MailerLite support A/B testing, ideal for students.
  6. Scalable Learning: Insights from small tests apply to larger campaigns, saving time.

Challenges for Students

  • Small Lists: Limited subscribers (e.g., <200) reduce statistical significance. Test with smaller segments or focus on high-impact variables like subject lines.
  • Time Constraints: Academic demands limit testing time. Automate tests and batch content creation.
  • Technical Knowledge: Understanding analytics or setup can be daunting. Use platform tutorials or focus on simple tests.
  • Data Interpretation: Beginners may struggle with metrics. Start with open rates and CTRs, using platform dashboards.
  • Resource Limits: Free plans may cap test frequency or features. Prioritize key campaigns.

Best Practices for A/B Split Testing

  1. Test One Variable: Isolate changes for clear insights.
  2. Set Clear Goals: Align tests with objectives (e.g., open rates for awareness).
  3. Use Sufficient Sample Size: Ensure enough subscribers per version (e.g., 50–100 for small lists).
  4. Test Regularly: Run tests monthly to refine strategies.
  5. Leverage Free Tools: Mailchimp’s free plan supports A/B testing for up to 500 subscribers.
  6. Monitor Metrics: Track open rates (20–30%), CTRs (5–10%), and conversions (2–5%).
  7. Ensure Compliance: Use double opt-in and include unsubscribe links to comply with GDPR, CAN-SPAM, and CASL.

Example of A/B Split Testing in Email Marketing

Scenario:

Ava, a junior business student, runs a blog, “StudySmart,” sharing productivity tips for college students. She uses MailerLite’s free plan to send weekly newsletters and promote a $20 digital product, “Ultimate Study Planner.” Ava wants to increase open rates for her newsletter to drive blog traffic. She conducts an A/B test on subject lines to optimize performance.

Implementation:

  1. Audience and Goals:
    • Audience: College students seeking study tips.
    • Goals: Increase open rates to 25% (from 20%), drive 15% more blog traffic, achieve 5% conversion rate for planner sales.
  2. Test Setup:
    • Variable: Subject line.
    • Version A: “5 Productivity Hacks for Students”
    • Version B: “[Name], Boost Your Grades with These Hacks”
    • Goal: Higher open rate.
    • Audience Split: 20% of her 500-subscriber list (100 per version), with the winner sent to the remaining 60% (300 subscribers).
    • Timing: June 24, 2025, 10 AM IST (optimized for opens).
  3. Email Content (Identical for Both Versions):
    • Body (200 words):

      Hi [Name],
      Finals season is brutal, but I’ve got your back! I used to struggle with procrastination until I found these productivity hacks that transformed my study game. My latest blog post shares 5 tips to help you study smarter, not harder.
      [Read Now]
      Quick preview:

      • Plan your week in 10 minutes.
      • Use the Pomodoro technique for focus.
      • Organize notes with one simple tool.
        Want to take it further? My Ultimate Study Planner has helped me ace exams, and it can help you too. Grab it now for just $20!
        [Get Your Planner]
        Got a study tip to share? Reply—I’d love to hear it!
        Cheers,
        Ava
        Update preferences [here] or [unsubscribe].
        Footer: StudySmart, 456 Campus Rd, Study City, SC 78901, ava@studysmart.com
    • Features: Personalized greeting, educational content, clear CTAs (blog link primary, planner purchase secondary), mobile-friendly design.
  4. Technical Setup:
    • Ava uses MailerLite’s A/B testing feature to create two versions, differing only in subject line.
    • She configures SPF and DKIM for deliverability and tests emails across Gmail and Outlook.
    • The test runs for 24 hours, with MailerLite automatically sending the winning version to the remaining 300 subscribers.
  5. Results:
    • Version A (“5 Productivity Hacks for Students”): 22% open rate (22/100 subscribers).
    • Version B (“[Name], Boost Your Grades with These Hacks”): 30% open rate (30/100 subscribers).
    • Winner: Version B, with statistical significance (95% confidence per MailerLite).
    • Action: Version B is sent to the remaining 300 subscribers, achieving a 28% overall open rate and 10% CTR, driving 20% more blog traffic.
    • Conversions: 6% of subscribers (30) purchase the planner, generating $600.
  6. Follow-Up:
    • Ava applies the winning personalized subject line format to future newsletters, boosting opens by 8% on average.
    • She plans to test CTA wording next (e.g., “Get Your Planner” vs. “Start Planning Now”).

Outcome:

  • The test increases open rates from 20% to 28%, exceeding Ava’s goal.
  • Blog traffic rises by 20%, and planner sales yield $600, surpassing the 5% conversion target.
  • Zero spam complaints and a 0.2% unsubscribe rate reflect high engagement.
  • Ava schedules monthly A/B tests to optimize CTAs and send times, building a data-driven strategy.
A/B Split Testing Guide for Students.md
markdown

Conclusion

A/B split testing is a critical tool for optimizing email campaigns, enabling students to make data-driven improvements to open rates, click-through rates, and conversions. By testing one variable at a time, segmenting audiences, and analyzing results, students can refine their emails with minimal resources. Despite challenges like small lists or time constraints, free tools and focused testing make it accessible. Ava’s example shows how a student can use A/B testing to boost newsletter performance, driving traffic and sales. As email marketing evolves, A/B testing remains essential for maximizing engagement and achieving goals efficiently.

What Are Feedback Emails, and How Can They Help?

Introduction

In today’s digital-first marketing environment, businesses and individuals alike strive to build strong connections with their audience. Whether you’re a student blogger, an affiliate marketer, a small business owner, or a startup founder, the key to lasting success is understanding and responding to the needs and opinions of your subscribers. One powerful yet often underutilized tool in achieving this is the feedback email.

Feedback emails are messages specifically designed to collect opinions, suggestions, and reactions from your email subscribers, customers, or users. They help bridge the gap between the sender and the receiver by turning one-way communication into a meaningful conversation. Used correctly, feedback emails can enhance customer satisfaction, improve products and services, and boost engagement—ultimately supporting business growth.

This article will explore what feedback emails are, why they matter, how to craft them effectively, and how they can be used in different contexts with a real-life example.


1. What Is a Feedback Email?

A feedback email is a message sent to recipients with the intention of gathering input, opinions, or responses regarding a specific topic. This could include:

  • A customer’s experience with a product or service

  • A subscriber’s opinion about a newsletter or blog

  • A user’s reaction to a new feature

  • Suggestions for improving content or design

  • Satisfaction with a recent purchase or interaction

Feedback emails may be structured as surveys, open-ended questions, or rating requests. The format can range from a one-question email (like a Net Promoter Score request) to a detailed survey with multiple sections.


2. Why Are Feedback Emails Important?

Feedback emails are more than just a polite gesture. They are strategic tools that offer real benefits, such as:


✅ A. Understanding Your Audience

Knowing what your readers or customers think helps you create content, products, or services that meet their needs. Feedback reveals:

  • What users enjoy or dislike

  • Pain points or frustrations

  • Areas for improvement

  • Topics they want to learn more about


✅ B. Improving Email Campaigns

By asking what readers think of your emails—subject lines, frequency, tone, or content—you can refine your strategy to increase open rates, click-through rates, and conversions.


✅ C. Increasing Engagement

When subscribers feel their opinions matter, they are more likely to engage with future emails, participate in surveys, and stay subscribed.


✅ D. Product and Service Development

For businesses, customer feedback is gold. It can inspire new features, product improvements, or service changes—guided by real user needs.


✅ E. Building Trust and Loyalty

Asking for feedback shows that you care. This builds trust, strengthens brand loyalty, and positions you as a responsive, customer-centric individual or brand.


✅ F. Identifying Promoters and Detractors

With tools like the Net Promoter Score (NPS), feedback emails help you identify who loves your brand (promoters) and who’s dissatisfied (detractors). This helps in tailoring follow-up strategies.


3. Types of Feedback Emails

There are several formats and styles of feedback emails. Depending on your goal, you can use one or a combination of the following:


📩 A. Simple Question Emails

These ask a single, focused question. They are low-friction and encourage quick replies.

Example:

“How did you like today’s newsletter? Reply and let me know—your thoughts help me improve.”


📊 B. Survey-Based Emails

Link to a short survey using platforms like Google Forms, Typeform, or SurveyMonkey.

Example:

“We’re curious—how can we make our emails more useful to you? Take this 2-minute survey and help shape our future content.”


⭐ C. Rating Emails

Ask recipients to rate their experience on a scale (e.g., 1 to 5 stars).

Example:

“How would you rate your recent download? Click a star below to tell us what you think.”


📣 D. Testimonial Requests

Ask satisfied users to write a review or share their experience publicly.

Example:

“Loved the planner you downloaded? We’d love a testimonial to share with others.”


📬 E. Customer Satisfaction (CSAT) or Net Promoter Score (NPS) Emails

Use standard rating tools to measure satisfaction or loyalty.

NPS Example:

“On a scale of 0 to 10, how likely are you to recommend our service to a friend?”


4. How to Write an Effective Feedback Email

Crafting a good feedback email involves clarity, respect, and simplicity. Here’s a structure that works:


Step 1: Use a Friendly Subject Line

Grab attention while staying genuine.

Examples:

  • “Can we ask you something?”

  • “Help us get better—your feedback matters!”

  • “We’d love to hear from you.”


Step 2: Personalize the Opening

Use the recipient’s name and a friendly tone.

“Hi Riya, thanks for being part of our newsletter community!”


Step 3: State the Purpose Clearly

Tell them why you’re asking for feedback and how it will be used.

“We’re always trying to improve. Your opinion will help us deliver content you actually enjoy and find useful.”


Step 4: Ask a Specific Question or Offer a Link

Be concise. If you’re asking multiple questions, keep the survey short.

“What did you think of last week’s productivity guide?”
[Take this 1-minute survey]


Step 5: Thank Them and Show Appreciation

End with gratitude and reassurance.

“Thanks in advance—your voice helps us grow!”


Step 6: Include a Call to Action

Use a clear CTA button or link.

[Give Feedback] or [Share Your Thoughts]


5. When to Send Feedback Emails

Timing can impact the success of your feedback email. Here are some smart times to send them:

Situation Timing
After a purchase 1–3 days later
After a download Same day
After newsletter subscription 1 week later
After customer support interaction Immediately
After completing a course/module Within 24–48 hours

6. Tools for Collecting Feedback via Email

Tool Features
Google Forms Free, easy surveys
Typeform Interactive forms and quizzes
SurveyMonkey Advanced analytics
Tally Simple, modern form builder
Mailchimp/ConvertKit Built-in survey blocks and segmentation
Zonka Feedback CSAT, NPS, and CX metrics

7. Real-Life Example: Feedback Email for a Student Productivity Blog

Scenario:

Aman, a college student who runs a blog and email list on productivity tools for students, offers a free “7-Day Study Planner” via email.


Objective:

Collect feedback to improve the planner and future content.


Email Sent:

Subject Line:
“What did you think of the study planner?”

Body:

Hi Aman,

A few days ago, you downloaded the 7-Day Study Planner. I hope it helped you stay focused and productive!

I’d love to hear what you think about it. Was it helpful? What can I improve?

Your feedback helps me create better tools and guides for students like you.

👉 [Click here to take a quick 3-question survey]

Thank you so much for your time and support.

  • Aman
    SmartStudyByAman.com


Survey Questions:

  1. On a scale of 1–5, how helpful was the planner?

  2. What did you like most?

  3. Any suggestions for improvement?


Results:

  • Open rate: 38%

  • Survey completions: 120 responses out of 500

  • Insights gathered:

    • Users loved the weekly overview but wanted a digital version

    • Many asked for a night-study variation

  • Action taken: Aman created a Google Sheets version and added a night-study edition


Outcome:

  • Higher engagement in follow-up emails

  • 25% increase in downloads of the updated planner

  • More affiliate conversions through the new planner


8. Benefits of Feedback Emails: Summary Table

Benefit Description
🎯 Refines content and product Direct input improves future materials
🤝 Builds trust Shows you value user opinions
📈 Increases engagement Personalized interaction boosts replies and clicks
🔍 Identifies issues Helps find and fix problems quickly
💡 Sparks new ideas Feedback can guide new content, products, or features
🔁 Encourages loyalty Subscribers feel heard and valued

Conclusion

Feedback emails are more than just a courtesy—they are a strategic asset in modern email marketing. They create a two-way dialogue, strengthen relationships, and provide actionable insights that help you grow.

Whether you’re a student blogger, a creator launching a digital product, or a marketer promoting a service, asking for feedback shows humility, curiosity, and care. These traits not only improve your content but also build community, trust, and long-term loyalty.


✅ Final Checklist for Sending Feedback Emails

Task Notes
🎯 Define your goal Product feedback, email experience, or support follow-up
✍️ Write a short, friendly email Keep it focused and personalized
📥 Use clear CTA Button or link to survey
📊 Choose the right tool Google Forms, Typeform, etc.
📆 Time it right After download, support, or purchase
📈 Analyze responses Look for trends and patterns
🔁 Take action and update users Show how you used the feedback

Want a free email template for requesting feedback from your subscribers? I can create one based on your blog, business, or niche—just let me know!

What is an ad extension?

Introduction

In Google Ads, the goal is not just to appear on the search results page, but to stand out. This is where ad extensions play a vital role. They allow advertisers to enhance their ads with additional information, links, and features that can help improve visibility, credibility, and click-through rates (CTR).

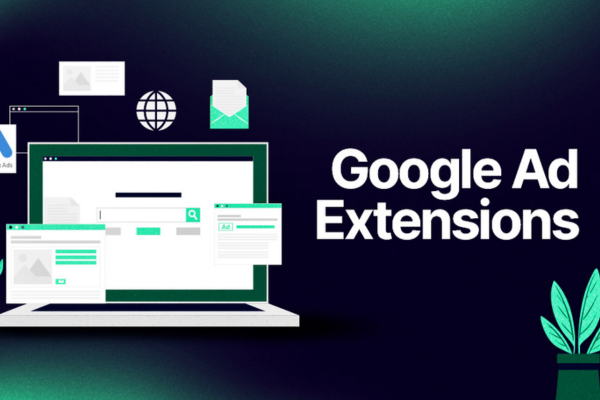
Simply put, an ad extension is an optional addition to your standard Google Ads text ad that provides extra content—such as links to specific pages, a phone number, location, or additional descriptions. These extensions make your ads more useful and appealing to potential customers and often result in higher engagement and performance.


Definition of Ad Extensions

Ad extensions are additional pieces of information that expand your ad, giving users more reasons to choose your business. They don’t cost anything extra to set up—you’re only charged if someone interacts with the extension (e.g., clicks a link, calls your number).

Extensions appear below your main ad copy in the search engine results and can significantly increase the real estate your ad occupies on the page.


Why Are Ad Extensions Important?

Ad extensions offer several benefits that can enhance your Google Ads campaign:

  • Increase Ad Visibility: Larger ads take up more space and grab more attention.

  • Boost CTR (Click-Through Rate): More information often means more clicks.

  • Improve Ad Rank: Google considers the expected impact of extensions when calculating your ad’s position.

  • Enhance User Experience: Gives users what they need faster—more links, phone numbers, locations, or descriptions.

  • Better ROI: Higher CTR and improved relevance mean better return on your ad spend.


Types of Ad Extensions (With Examples)

There are two main categories: Manual Extensions (which you set up) and Automated Extensions (added automatically by Google when eligible).

1. Sitelink Extensions

  • Show additional links to specific pages on your website.

  • Example: For MakeMyTrip, a flight booking ad could show:

    • Flights to Goa

    • International Flights

    • Holiday Packages

    • Customer Support

This helps users go directly to the page they’re most interested in.

2. Callout Extensions

  • Add short, descriptive text to highlight key features.

  • Example for MakeMyTrip:

    • “24×7 Customer Support”

    • “Best Price Guarantee”

    • “No Hidden Charges”

Callouts are not clickable, but they add persuasive value.

3. Structured Snippet Extensions

  • Highlight specific aspects of your products/services.

  • Example for a travel ad:

    • Header: “Destinations”

    • Values: Goa, Manali, Maldives, Dubai

It tells users what options they can expect if they click.

4. Call Extensions

  • Add a phone number to your ad, allowing users to call directly.

  • Particularly useful for mobile users.

  • Example: “Call Now to Book Your Holiday – 1800-123-4567”

5. Location Extensions

  • Show your business address, a map, or distance from the user.

  • Useful for businesses with physical locations (e.g., MakeMyTrip stores or offices).

6. Affiliate Location Extensions

  • Help show nearby retail locations that sell your product.

  • Not commonly used for service-based platforms like MakeMyTrip but relevant for product brands.

7. Price Extensions

  • Display prices of specific products or services right under the ad.

  • Example for MakeMyTrip:

    • Goa Holiday Package – ₹9,999

    • Manali Weekend Trip – ₹7,499

    • Dubai Tour – ₹29,999

Each item is clickable and leads to a relevant page.

8. App Extensions

  • Add a direct link to download your mobile app.

  • Example: “Download the MakeMyTrip App – For Exclusive Mobile Offers”


Automated Extensions

Google may automatically add extensions to improve performance when it deems the context appropriate. These include:

  • Automated callout extensions

  • Dynamic sitelinks

  • Seller ratings

  • Previous visits

  • Dynamic structured snippets

These do not require manual setup but still contribute to the overall ad experience.


How Ad Extensions Improve Performance

1. Higher CTR (Click-Through Rate)
Extensions provide more options and information, encouraging more users to click.

2. Improved Quality Score
Google considers ad relevance, CTR, and landing page experience. Well-optimized extensions boost these metrics.

3. Better Ad Rank
Your ad’s position is based on your bid and quality. Extensions improve quality and expected impact, which can move your ad higher on the page.

4. Greater Conversion Opportunities
With multiple links or direct contact options (call, app, directions), users can take quicker actions, leading to faster conversions.


Example: Ad with Extensions for MakeMyTrip

Headline: Book Flights to Goa – Up to 40% Off | MakeMyTrip
Description: Exclusive travel deals on flights to Goa. Fast booking, no hidden fees.
Sitelinks:

  • Book Goa Flights

  • Hotel Deals in Goa

  • Holiday Packages

  • Travel Support

Callout Extensions:

  • 24×7 Customer Service

  • Easy Cancellations

  • No Convenience Fee

Structured Snippet:
Destinations: Goa, Kerala, Manali, Dubai

Call Extension:
Call Now: 1800-456-7890

Price Extensions:

  • Goa Flights – ₹2,799

  • Goa Hotels – ₹999/Night

  • Goa Holiday Package – ₹9,999

This ad is visually rich, highly informative, and offers multiple options for the user to interact—thus increasing the chances of a click and eventual conversion.


Best Practices for Using Ad Extensions

  1. Use All Relevant Extensions
    Google recommends using as many as possible. You’re not charged extra, and it increases your ad’s real estate.

  2. Keep It Relevant
    Only show extensions that are meaningful to your ad’s intent. Avoid clutter.

  3. Write Clear, Concise Text
    Use action-based language like “Shop Now,” “Book Today,” or “Get Deal.”

  4. Test Regularly
    Track extension performance and update content as needed. Some may perform better than others.

  5. Use Extensions Strategically by Campaign
    Tailor extensions based on campaign goals. For example:

  • Flight Campaigns → Sitelinks to booking routes

  • Hotel Campaigns → Price extensions for nightly rates

  • App Promotions → App extensions


Measuring Performance of Ad Extensions

Google Ads lets you track how each extension performs. Key metrics include:

  • Clicks on each extension type

  • CTR for ads with and without extensions

  • Conversion rates from extension interactions

  • Impression share

By analyzing these, you can refine your extension strategy and remove or replace underperforming ones.


Common Mistakes to Avoid

  • Repetition: Don’t use the same text in callouts, sitelinks, and headlines.

  • Irrelevant Links: Sending users to unrelated landing pages causes high bounce rates.

  • Overloading with Info: Too many extensions can overwhelm the user.

  • Not Using Mobile-Friendly Extensions: E.g., forgetting call extensions on mobile campaigns.


Conclusion

Ad extensions are not just optional extras—they’re a critical component of successful Google Ads campaigns. They enhance visibility, boost engagement, improve ad rank, and offer multiple paths for the user to convert. For brands like MakeMyTrip, which offer a wide variety of travel-related services, extensions can be used to showcase different travel options, deals, and features all within a single ad.

When used strategically, ad extensions can elevate the performance of your ads significantly, making your campaign more efficient, cost-effective, and results-driven. Whether you’re promoting hotel bookings, flight deals, or holiday packages, leveraging the right mix of extensions will help you reach your advertising goals faster.

How to Become a Digital Marketing Specialist

Digital marketing is one of the fastest-growing fields today. Many people are interested in building a career in digital marketing, and becoming a digital...

What is SMM in Digital Marketing

SMM, or Social Media Marketing, is one of the most important parts of digital marketing. In simple words, SMM is the process of using...

What is Google Analytics in Digital Marketing

Google Analytics is one of the most important tools in digital marketing. It helps businesses understand how people interact with their websites and online...

What is Google AdWords in Digital Marketing

Google AdWords is one of the most important tools in digital marketing. Many businesses use AdWords to reach their target audience online and increase...

What Is CPM in Digital Marketing

In digital marketing, understanding how your ads are priced and measured is very important. Different advertising models help marketers track performance and control spending....