Home Blog Page 10

How to set up a Performance Max campaign for shopping?

Introduction
Performance Max (PMax) is Google Ads’ most advanced campaign type that allows advertisers to access all of Google’s inventory from a single campaign — including Search, Display, YouTube, Gmail, Discover, and Shopping. It is especially powerful for eCommerce businesses like Zara, Myntra, or Skechers that want to promote products from their Google Merchant Center feed with full automation and broad reach.

Unlike Standard Shopping campaigns, Performance Max uses machine learning to automate bidding, audience targeting, and ad placements. You provide assets (text, images, video, product feed), and Google dynamically creates ads to serve them to the most relevant audiences across its platforms.

Here is a step-by-step guide to setting up a Performance Max campaign for Shopping:

Step 1: Prerequisites and Setup Checklist
Before launching your campaign, ensure the following:

  1. You have a Google Ads account

  2. You have a Google Merchant Center account with an approved and active product feed

  3. Your Merchant Center and Google Ads accounts are linked

  4. Conversion tracking is set up correctly (e.g., purchase events on your website)

  5. You’ve set up audience signals or customer lists (optional, but useful for machine learning)

  6. You have creative assets ready (headlines, descriptions, logos, images, video if available)

Step 2: Log in to Google Ads and Start Campaign Creation
– Sign in to Google Ads
– Click the + New Campaign button
– Select a goal: choose Sales, Leads, or Website traffic
– Select Performance Max as your campaign type
– If prompted, select the relevant Merchant Center account
– Choose the country where your products are sold
– Click Continue

Step 3: Campaign Settings

  1. Campaign Name
    Give your campaign a descriptive name (e.g., “PMax – Zara Dresses – India – June”)

  2. Bidding Strategy
    Choose between:
    Maximize conversion value (recommended for eCommerce)
    – Add a Target ROAS (tROAS) if you want to control return on ad spend (e.g., 400%)
    This bidding strategy allows Google to automatically bid higher for users likely to purchase higher-value products.

  3. Budget
    Set a daily budget appropriate for your product volume and expected performance. Example: ₹5,000/day for Zara’s full women’s apparel range.

Step 4: Location and Language
– Set target locations where you want your products to show (e.g., India or specific cities)
– Choose the language of your customers (typically English or Hindi for Indian markets)

Step 5: Asset Group Creation
An Asset Group is a set of creatives that Google combines dynamically. You can create multiple asset groups for different categories or audiences.

  1. Asset Group Name
    Example: “Zara Summer Dresses” or “Skechers Sports Shoes”

  2. Final URL
    Enter the main landing page or your eCommerce homepage

  3. Images and Logos
    Upload high-resolution images (product lifestyle photos, close-ups, banners)
    Include brand logos in square (1:1) and landscape (4:1) format

  4. Headlines (30 characters max)
    Provide up to 5 short headlines like:
    – “Stylish Summer Dresses”
    – “Up to 50% Off on Footwear”
    – “New Fashion Collection 2025”

  5. Long Headlines (90 characters max)
    Include 1–5 long headlines. Example:
    – “Upgrade Your Wardrobe with Zara’s Elegant Summer Styles”
    – “Skechers Running Shoes – Built for Comfort & Performance”

  6. Descriptions
    Add up to 5 product-focused descriptions. Example:
    – “Shop lightweight cotton dresses in vibrant colors”
    – “Skechers sneakers with arch support for daily wear”

  7. Call-to-Action (CTA)
    Choose from available options like “Shop now”, “Buy now”, “Learn more”

  8. Videos (Optional but Highly Recommended)
    If no video is uploaded, Google will auto-generate one using your assets
    Tip: Upload a short YouTube product ad or lifestyle video for better control

  9. Audience Signals (Optional but useful)
    These help jumpstart machine learning. You can include:
    – Website visitors
    – Remarketing lists
    – Custom segments (people who search for competitors or specific product categories)
    – Interests like “Luxury Shoppers” or “Fashion Enthusiasts”

Example: Zara can create a custom segment targeting users who searched for “summer dresses,” “boho style,” or “midi dress under ₹2000.”

Step 6: Product Listing Settings
Choose which products from your Merchant Center feed you want to advertise.

Options include:
– All products
– Filter by product type, brand, or custom label
Example: Zara can choose only “Women > Dresses” using product type filtering. Skechers may select only “Men’s Running Shoes” under brand and category.

Step 7: Final URL Expansion
By default, Google enables URL expansion, allowing it to choose relevant landing pages from your website.
You can disable this if you want full control, especially if specific product URLs need to be maintained.

Step 8: Ad Extensions (Optional but Recommended)
Add extensions like:
– Sitelink Extensions (e.g., “Shop Tops,” “Shop Accessories”)
– Callout Extensions (“Free Returns,” “COD Available”)
– Structured Snippets (“Available Sizes: S, M, L, XL”)

Step 9: Review and Publish
– Review all the settings
– Double-check budget, bidding, and product filters
– Click Publish Campaign

Your campaign will go under review. Once approved, Google starts showing your ads within 24–48 hours. Machine learning takes a few weeks to ramp up fully, so allow a learning period before optimizing heavily.

Performance Monitoring & Optimization
– Check campaign performance in Google Ads under “Campaigns > Performance Max”
– Monitor metrics like conversions, ROAS, cost per conversion, impressions, and clicks
– Segment by asset group, product ID, or listing group
– Use insights like “Top performing audience segments,” “Top converting search terms”
– Pause low-performing asset groups or products
– Adjust bids or add custom labels in Merchant Center feed to improve control

Example: Performance Max Campaign for Zara
Zara launches a PMax campaign targeting women’s summer fashion in India. They upload creative assets like lifestyle photos of dresses, use keywords like “casual cotton dress” in their audience signal, and pull products from Merchant Center labeled “Summer 2025.” They set a budget of ₹10,000/day with a target ROAS of 600%. Over two weeks, Google optimizes placements and starts serving product ads on YouTube, Gmail, and Google Search to users most likely to convert. The campaign helps Zara reach new audiences and recover abandoned carts through remarketing.

Example: Performance Max Campaign for Skechers
Skechers targets fitness-conscious males aged 25–40. They upload gym and running shoe images, link their full product catalog, and include audience signals like “Running Enthusiasts” and “Sports Equipment Shoppers.” Their creative includes videos of people jogging in Skechers shoes. Within one month, the campaign improves online sales by 40% due to automatic optimization across Google’s surfaces.

Conclusion
Performance Max is Google’s most powerful campaign type for eCommerce businesses that want to simplify campaign management while maximizing reach and conversions. By setting up a Performance Max campaign connected to your Merchant Center feed, you can automatically promote your products across all of Google’s platforms using smart bidding, machine learning, and real-time audience insights. Brands like Zara and Skechers are already using PMax to scale their online visibility, improve return on ad spend, and personalize customer journeys without needing separate campaigns for each Google network. With the right assets, targeting, and product feed, Performance Max becomes a sales powerhouse for any modern online business.
What are shopping campaigns?

Introduction
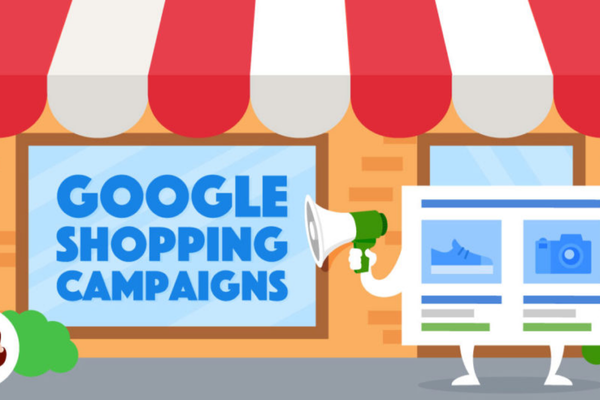
Shopping campaigns are a type of Google Ads campaign that allow businesses to promote their products directly within Google Search results and across the Google ecosystem using product data from the Google Merchant Center. Unlike traditional text ads, Shopping ads display product images, titles, prices, store names, and even promotions, helping users to make more informed buying decisions at a glance. These ads are especially valuable for eCommerce brands like Zara, Myntra, or Skechers, which sell a wide range of physical products online.

Shopping campaigns are essential for reaching high-intent users—people who are already searching for a specific item to buy. These campaigns use the data provided in your Merchant Center feed (not keywords) to decide when and where to show your ads.

How Shopping Campaigns Work
Instead of using keywords, Shopping campaigns rely on your product feed, which includes information like product title, category, price, brand, and availability. When a user types a relevant query (like “white sneakers under 3000”), Google matches that search with products from your Merchant Center feed and displays them as Shopping ads.

For example, if Skechers lists a product called “Skechers Men’s White Slip-On Sneakers ₹2,799” in their feed, it may appear at the top of the Google search results when a user searches for that phrase or something similar. These ads are more visual and often appear above or beside regular text ads.

Where Shopping Ads Appear
– Google Search results page (top or side of the page)
– Google Shopping tab
– Google Images
– YouTube (in video ad carousels)
– Google Display Network (through Smart Shopping or Performance Max)
– Gmail and Discover feed (via Performance Max)

Components of a Shopping Ad
– Product image
– Product title
– Price
– Store name or brand name
– Ratings and reviews (if available)
– Promotions like “Free Shipping” or “20% Off” (if configured)
– Availability (e.g., in stock)

Types of Shopping Campaigns

  1. Standard Shopping Campaigns
    This traditional type gives you more control over product grouping, bidding strategies, and negative keywords. You can divide products by category, brand, item ID, or custom labels. You can also set manual bids or use automated bidding strategies like Maximize Conversion Value or Target ROAS.

  2. Smart Shopping Campaigns (Now Migrated into Performance Max)
    Smart Shopping was a goal-based campaign type that combined Standard Shopping with remarketing across Google networks. Google automated bidding, ad placement, and audience targeting. In 2022, Smart Shopping campaigns began transitioning into Performance Max campaigns.

  3. Performance Max Campaigns with Shopping Feed
    These are the new default campaigns for product-based advertising. Performance Max campaigns pull products from Merchant Center and automatically serve them across Google Search, Shopping, YouTube, Display, and Gmail. You provide creative assets and audience signals, but Google automates the rest.

Benefits of Shopping Campaigns
Highly Visual: Users see product images before clicking, increasing relevance and reducing bounce rate
High Purchase Intent: Ads show to users who are already looking for a product
Automated Targeting: Google matches queries to your product data, eliminating keyword management
Increased Visibility: Products may appear in multiple locations across Google simultaneously
Better CTR and ROI: Visuals and price transparency attract more qualified clicks
Easier Product-Level Optimization: You can view performance metrics for each product or product group

How to Set Up a Shopping Campaign

  1. Create a Merchant Center Account
    Upload your product data feed including required attributes like title, price, availability, image, and product URL.

  2. Link Merchant Center with Google Ads
    This lets your Google Ads account access the products in Merchant Center.

  3. Create a New Campaign in Google Ads
    – Select “Sales” or “Leads” as your campaign goal
    – Choose “Shopping” as the campaign type
    – Select your linked Merchant Center account
    – Choose either Standard Shopping or Performance Max
    – Set your bidding strategy (manual CPC, Maximize clicks, Target ROAS, etc.)
    – Define daily budget and campaign settings
    – Create ad groups or asset groups (for Performance Max)
    – Launch the campaign

  4. Monitor and Optimize
    After the campaign runs, review performance data by product or product group. Exclude poorly performing items, adjust bids, and segment products using custom labels for better control.

Example: Zara Shopping Campaign
Zara uploads 1,000 products to Google Merchant Center, including women’s dresses, shirts, and shoes. In their Google Ads account, they create a Standard Shopping Campaign targeting India with a budget of ₹10,000/day. They segment products by category (e.g., Dresses, Shoes, Tops) and apply different bids to each based on performance. When users search “floral midi dress under 4000,” Google shows a Zara ad featuring their top-performing dress, with price, image, and a link to buy directly.

Example: Skechers Performance Max Campaign
Skechers uploads their footwear collection to Merchant Center and links it with a Performance Max campaign. Google automatically displays product ads on YouTube, Search, Display, and Gmail to users who have previously visited sneaker-related pages. The campaign uses “Running shoes” and “Walking footwear” as audience signals, and Google adjusts the bidding to target users more likely to convert. Skechers monitors ROAS and adjusts their feed for better product performance.

Key Metrics in Shopping Campaigns
Impressions: How many times your product ads were shown
Clicks: Number of times users clicked on your product ads
CTR (Click-Through Rate): Ratio of clicks to impressions
Conversions: Purchases or other actions taken after clicking
ROAS (Return on Ad Spend): Total revenue divided by ad spend
Cost per Click (CPC): Average amount paid for each click

Best Practices for Shopping Campaigns
Optimize Product Titles: Include key terms users search for (e.g., “Black Leather Handbag – Zara”)
Use High-Quality Images: Plain white background, product centered, no watermarks or logos
Regularly Update Feed: Make sure prices, availability, and images are always accurate
Use Custom Labels: Segment products for bid adjustments (e.g., New Arrivals, Clearance, High Margin)
Enable Ratings: Show reviews and star ratings to increase trust
Test Bidding Strategies: Try Target ROAS or Maximize Conversion Value if you have enough data
Segment Campaigns: Group products by brand, price range, or performance to manage bids better
Exclude Poor Performers: Stop advertising low-CTR or high-CPC items

Conclusion

Shopping campaigns are a powerful advertising format for online retailers who want to showcase products in a visually appealing and performance-driven way. These campaigns let users see what you’re selling—before they even click—leading to better-qualified traffic and higher conversion rates. For businesses like Zara, Myntra, and Skechers, Shopping campaigns are essential to scaling product-based advertising.

How to link Google Ads with Google Merchant Center?

Introduction
To run Google Shopping Ads, Performance Max campaigns, Dynamic Remarketing, and Free Listings using your product inventory, you must first link your Google Merchant Center (GMC) account with your Google Ads account. Linking these two platforms allows you to use your product data from Merchant Center in your Google Ads campaigns. This process is vital for any eCommerce business like Zara, Myntra, or Skechers, where product inventory changes frequently, and ads must always show updated price, stock, and image data.

In this guide, we’ll explore the step-by-step process, explain why linking is important, show how to troubleshoot, and provide best practices — all explained in detail with examples.

Why Link Google Ads and Merchant Center?
Because Google Ads doesn’t store product information directly. To show product ads (Shopping Ads, Performance Max, Free Listings), it must access a product feed hosted in your Merchant Center account. When you link the accounts, Google Ads can pull real-time product data like title, price, image, and availability. You can create shopping-specific campaigns in Google Ads. You can track conversions related to Shopping ads. You unlock advanced ad types like dynamic remarketing and Performance Max. Product updates in Merchant Center are automatically synced with ads. For example, if Zara uploads a new product line of dresses to Google Merchant Center, they can then use that feed in their Google Ads account to create Shopping or Performance Max ads. Any changes (like discounts, price updates, or availability status) are instantly reflected in the ads through this link.

Step-by-Step: How to Link Google Ads with Merchant Center
Step 1: Create Both Accounts
You must have a Google Ads account (https://ads.google.com) and a Google Merchant Center account (https://merchants.google.com). If you don’t already have them, create both using the same Google login or Google Business Account.

Step 2: Log in to Merchant Center
Go to https://merchants.google.com. Click on the gear icon (Tools & Settings) in the top right. Under the “Settings” section, click on Linked Accounts.

Step 3: Locate Google Ads under Linked Accounts
In the Linked Accounts dashboard, you’ll see a list of available services to link. Find the Google Ads section. Click “Link Account”.

Step 4: Enter Your Google Ads Customer ID
Type your Google Ads customer ID, which is a 10-digit number visible in the top-right corner of your Google Ads dashboard (e.g., 123-456-7890). After entering the ID, click Send Link Request.

Step 5: Accept the Request in Google Ads
Now switch to your Google Ads account. Go to Tools & Settings > Setup > Linked Accounts. Click on Google Merchant Center. You will see the pending request from your Merchant Center account. Click Approve.

Step 6: Confirm the Link
Return to your Google Merchant Center account. Go back to Linked Accounts. You’ll now see that your Google Ads account is successfully linked. You can now use your product feed in Google Ads Shopping or Performance Max campaigns.

Alternative Method: Link from Google Ads First
You can also start the linking process from the Google Ads interface. Go to Google Ads > Tools & Settings > Setup > Linked Accounts. Click on Google Merchant Center. Click Link New Account. Enter your Merchant Center Account ID. A request will be sent to Merchant Center, where you’ll need to approve it. Either direction works, but the most common flow starts from Merchant Center.

Important Points to Remember
You can link multiple Google Ads accounts to one Merchant Center account. This is useful for agencies managing multiple clients. You can also link one Google Ads account to multiple Merchant Center accounts, though this is less common. Make sure the email used in both accounts has admin access. Your Google Ads account must have billing and payment settings configured. If the link request isn’t accepted within 30 days, it expires, and you must resend it.

Troubleshooting Linking Issues
Issue 1: Link request not visible in Google Ads. Refresh the page. Make sure you’re logged in with an account that has admin-level access. Check if you entered the correct 10-digit customer ID in Merchant Center.

Issue 2: Cannot approve link. Verify that your account isn’t under a Manager Account (MCC) trying to link a sub-account. Switch to the correct sub-account and approve the request.

Issue 3: Feed not showing in Google Ads. Make sure your product feed is active, approved, and contains no errors. Check your target country settings in Merchant Center. Verify that the campaign in Google Ads is set up to use your Merchant Center feed.

How Zara Would Use This Connection
Let’s say Zara has 500 products listed on its website. After setting up a Google Merchant Center account and uploading their product feed (including product titles like “Zara Floral Maxi Dress – ₹3,499”), they link it to their Google Ads account. Now, when they launch a Performance Max campaign, they select the product feed as the creative source. Because the link is active, the campaign automatically pulls Zara’s real-time inventory, showing product image from the feed, live price, in-stock status, and direct product URL. This means Zara’s ads are accurate, automated, and reflect any product changes instantly without manual ad editing.

Best Practices After Linking
Regularly update product feeds. Keep your product feeds accurate and update them daily using scheduled fetch or Content API. This prevents disapprovals or misleading ads. Monitor Diagnostics tab. Merchant Center has a diagnostics section where you can see errors like disapproved items, missing GTIN or MPN, incorrect image URLs. Fix these to ensure all products are eligible for ads. Use custom labels. Custom labels in your feed let you segment products by season (e.g., “Winter”), performance (e.g., “Bestseller”), or sale items. This helps in targeting and bidding strategy in Google Ads. Enable conversion tracking. Once linked, ensure that Google Ads has conversion tracking set up. This allows better optimization based on actual purchases. Use for multiple campaign types. Once linked, use the Merchant Center feed not just for Shopping Ads, but also for dynamic remarketing, YouTube ads with product overlays, Discovery ads, and free listings on Google Shopping tab.

Conclusion
Linking Google Merchant Center with Google Ads is a foundational step in launching effective eCommerce advertising campaigns. It ensures your product data — such as pricing, images, availability, and titles — flows directly into your ads, allowing for dynamic, up-to-date, and personalized advertising experiences. Brands like Zara, Skechers, and Myntra use this connection to scale their marketing efficiently, reduce manual work, and ensure ad accuracy. Once linked, you unlock the full power of product-based ad formats like Shopping Ads, Performance Max, and Dynamic Remarketing, all powered by your feed in Merchant Center. With consistent updates, smart segmentation, and regular monitoring, this link becomes a powerful tool to drive online sales, improve ad performance, and grow your brand in the competitive eCommerce space.

What is a Merchant Center account?

Introduction
A Google Merchant Center account is a free platform provided by Google that allows businesses, especially eCommerce retailers, to upload and manage their product data feeds so their items can appear across various Google surfaces like Google Shopping, Search, YouTube, and Display. It acts as a bridge between your product inventory and Google Ads, making it possible to run Shopping Ads, Performance Max campaigns, and Free product listings using live product data from your online store.

This platform is essential for companies like Zara, Skechers, or Myntra, who have thousands of SKUs and need a centralized place to ensure their product data — such as price, image, availability, and description — is correct, updated, and optimized for Google’s ad systems.

Core Function of Merchant Center

The primary job of the Merchant Center is to store, manage, and synchronize product information. This information is then used by Google Ads to automatically create product-based advertisements. For example, if Zara wants to advertise a new line of dresses, they’ll upload those products into the Merchant Center. Once the feed is approved, Google can start showing those products in Shopping Ads with price, product name, image, and rating — directly on the search results page.

What Kind of Data Is Managed in Merchant Center?
– Product title and description
– Product image and image link
– Price
– Product URL (landing page)
– Stock status (in stock, out of stock, preorder)
– Product category
– Brand, GTIN, or MPN
– Shipping and return information
– Custom labels for campaign segmentation

How to Set Up a Merchant Center Account

  1. Go to https://merchants.google.com

  2. Click “Get Started” and sign in with your Google Account

  3. Enter your business information (country, business name, website)

  4. Verify and claim your website URL
    – Add an HTML tag to your website
    – Or upload an HTML file
    – Or verify via Google Analytics / Google Tag Manager

  5. Choose how you want to submit your product data
    – Upload manually via spreadsheet (CSV, TSV, or XML)
    – Use Google Sheets templates
    – Schedule regular uploads from your server
    – Use Content API for real-time updates

  6. Link Merchant Center with Google Ads
    – This allows you to run Shopping Ads, Performance Max, and Dynamic Remarketing

What Campaigns Can You Run Using Merchant Center Data?

Shopping Ads: Appear directly on the Google search results with product image, price, and seller name
Performance Max Campaigns: Use product feeds across all Google platforms including YouTube, Gmail, and Discover
Free Listings: Appear on Google Shopping tab at no cost
Dynamic Remarketing Ads: Show users the specific products they previously viewed
Local Inventory Ads: Show real-time availability for products in physical stores near the user

Example: Zara’s Use of Merchant Center

Zara uploads its entire clothing inventory — from women’s dresses to men’s jackets — into Merchant Center. Their feed includes prices, titles like “Zara Cotton Shirt – ₹1,499,” image links, availability status, and URLs pointing to their product pages. Once approved, these products are used in:
Google Shopping Ads: Shown to people searching for “cotton shirts online”
Free Listings on Shopping tab
Performance Max campaigns to promote sales and new arrivals
Dynamic remarketing ads targeting users who visited product pages but didn’t buy

Benefits of a Merchant Center Account

Automates product-based advertising
Syncs product updates (price, stock, title) in real-time
Increases visibility through Shopping Ads and free listings
Helps scale campaigns by powering Performance Max and Dynamic Ads
Gives insights into diagnostics, product disapprovals, and opportunities for improvement
Enables structured segmentation using product types and custom labels

Common Merchant Center Tools and Features

Diagnostics: See which products are approved or disapproved and why
Growth tab: Suggestions for improving feed quality or expanding to new countries
Supplemental Feeds: Add more information to your main feed without editing the source
Business information: Add logo, store name, shipping policy, return policy
Multi-country feeds: Run the same product ads across different countries with localized pricing and currency

Feed Requirements to Note

– All products must meet Google’s policy and formatting rules
– Titles should be relevant, clear, and match the landing page
– High-resolution images are required (no watermarks, logos, or promotional text)
– Prices in the feed must exactly match the product page
– If products are out of stock, they must be marked accordingly

Challenges and Best Practices

Feed Rejections: Common due to incorrect formatting, missing GTINs, or policy violations
Maintenance: Feeds need to be updated daily, especially for fast-moving inventory
Feed Optimization: Use relevant keywords in titles and descriptions to improve ad visibility
Use Custom Labels: Segment products (e.g., Bestsellers, Clearance, High-ROAS) for strategic bidding in Google Ads
Monitor Diagnostics: Regularly check the Merchant Center for warnings or errors

Conclusion
A Merchant Center account is essential for running product-based advertising on Google. It allows businesses to store and manage their product inventory in a structured format, ensuring real-time accuracy in Shopping Ads, Performance Max campaigns, and free product listings. For large eCommerce brands like Zara, Skechers, or Myntra, the Merchant Center is the backbone of a scalable Google Ads strategy. It connects products to audiences at the right time, with the right message, and through the most visual ad formats available on the internet — all while automating what would otherwise be a massive manual effort.

What is feed-based advertising?

Introduction
Feed-based advertising is a type of digital advertising that uses structured data feeds to automatically generate and update ads based on real-time product or service information. Instead of creating individual ads manually, advertisers upload a feed (usually a spreadsheet or XML file) that contains product details like names, images, prices, descriptions, availability, and links. The advertising platform (such as Google Ads, Facebook Ads, or Microsoft Ads) then uses this feed to dynamically create and display ads across its networks.

This method is especially useful for large eCommerce businesses like Zara, Skechers, or Myntra, where hundreds or thousands of products are promoted, and inventory or pricing changes regularly. Feed-based advertising enables more scalable, relevant, and performance-driven campaigns while reducing manual work.

How It Works

  1. Create a Product Feed
    The feed is a structured file (CSV, TSV, XML, or Google Sheets) containing product attributes such as:
    – Product ID
    – Title
    – Description
    – Product URL
    – Image URL
    – Price
    – Availability
    – Brand
    – GTIN/SKU
    – Custom labels (e.g., “New Arrival”, “Clearance”)

  2. Upload the Feed to the Ad Platform
    – Google Ads: Via Google Merchant Center
    – Facebook/Instagram: Via Meta Catalog Manager
    – Microsoft Ads: Via Microsoft Merchant Center

  3. Link the Feed to a Dynamic Campaign Type
    Once the feed is uploaded, you can connect it to:
    – Google Shopping Campaigns
    – Performance Max Campaigns
    – Facebook Dynamic Ads
    – Dynamic Remarketing Campaigns
    – Local Inventory Ads
    – Travel or Hotel Ads (for services)

  4. Automated Ad Creation and Updates
    The ad platform uses the feed to generate product ads automatically. Any changes to the feed (like a price drop or stock update) are reflected in the ads in real-time, ensuring accuracy and freshness.

Example: Zara’s Use of Feed-Based Advertising

Zara uploads a product feed to Google Merchant Center containing all their women’s apparel items. The feed includes product titles like “Zara Linen Midi Dress,” prices like “₹2,499,” and direct URLs to product pages. This feed powers:
– Google Shopping Ads that show up when users search “linen midi dress”
– Performance Max campaigns that show product cards across Google Search, Display, YouTube, and Gmail
– Remarketing ads that show previously viewed products to users who visited Zara’s website

When Zara updates a product’s price or marks it as “out of stock” in the feed, the ads automatically reflect this, without needing manual edits.

Types of Feed-Based Advertising

  1. Google Shopping Ads
    – Uses a feed from Google Merchant Center
    – Products appear with images, prices, and ratings directly on the search results page
    – Ideal for large eCommerce sites promoting physical goods

  2. Performance Max Campaigns
    – Google automatically selects the best ad format and placement
    – Feed powers product listings across multiple Google channels
    – Uses Smart Bidding and audience signals

  3. Dynamic Remarketing Ads
    – Re-show users the exact products they viewed earlier
    – Feed provides product info like images and prices for dynamic templates
    – Used on Display Network and across Meta platforms

  4. Facebook & Instagram Dynamic Ads
    – Uses a product catalog connected to Meta Ads Manager
    – Shows personalized product carousels based on browsing behavior
    – Often used for retargeting and upselling

  5. Local Inventory Ads
    – Combines product feeds with in-store inventory data
    – Shows nearby users what products are available at local stores
    – Ideal for retailers with online and offline presence

Benefits of Feed-Based Advertising

Scalability: Manage thousands of ads for thousands of products without manual input
Real-Time Updates: Ads always reflect the current price, availability, and offers
High Relevance: Dynamic ads show users the exact products they searched or browsed
Improved CTR & ROI: Personalized and accurate ads perform better
Automation: Saves time for marketers and reduces errors
Customization: Feeds can be segmented using custom labels (e.g., high-margin products, clearance items, seasonal sales)

Custom Labels and Feed Optimization

– Advertisers can use custom labels in the feed to group products by strategy:
– Label 0: “Bestseller”
– Label 1: “Discounted 30%+”
– Label 2: “New Arrival”
– These labels help in creating separate campaigns or bid adjustments for better performance

Feed Optimization Tips:
– Use clear, keyword-rich titles
– Include high-quality images
– Keep pricing consistent with the landing page
– Avoid disapproved products or missing attributes
– Use GTINs or MPNs for better matching on Google

Challenges of Feed-Based Advertising

Feed Quality: Poor formatting, missing data, or incorrect attributes can lead to disapproved products
Technical Setup: Requires knowledge of feed specs, tagging, and Merchant Center setup
Maintenance: Requires regular feed updates and monitoring
Compliance: Needs to follow platform-specific feed policies, especially for restricted items like cosmetics or electronics

Tools for Managing Feeds

Google Merchant Center: For feed uploads and diagnostics
Feed Management Tools: Such as DataFeedWatch, Channable, or GoDataFeed to automate and optimize feeds
Google Sheets: For simple manual feeds
Shopify or Magento Integrations: For eCommerce platforms with built-in feed syncing tools
Content APIs: For programmatic feed updates and real-time inventory sync

Example: Skechers Dynamic Remarketing Campaign

Skechers runs a Google Display campaign targeting users who visited their “Running Shoes” category. Their feed includes product IDs, titles like “Skechers Go Run 7,” images, and prices. When a user browses “Go Run 7” but doesn’t buy, they later see a remarketing ad with that exact shoe, its price, and a CTA like “Buy Now – Free Shipping.” This personalization drives higher conversion rates.

Conclusion

Feed-based advertising is essential for large-scale, product-heavy advertisers who want to automate ad creation, stay current with inventory changes, and deliver personalized ad experiences. By using structured product feeds in platforms like Google Ads or Meta Ads, brands like Zara, Skechers, and Myntra can run more accurate, scalable, and efficient campaigns. When managed well, feed-based ads not only save time but also improve ROAS, lower cost per conversion, and increase customer satisfaction through real-time relevancy and automation.

How to structure an account for a large eCommerce site?

Introduction
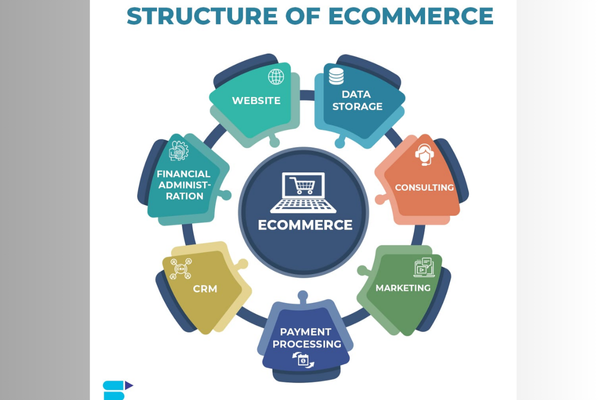
Structuring a Google Ads account for a large eCommerce website requires a strategic, scalable, and performance-driven approach. A good structure ensures easy campaign management, better reporting, stronger ad relevance, and higher return on ad spend (ROAS). Whether the brand is Zara, Skechers, Myntra, or any large retailer, a well-organized account lets you efficiently manage thousands of products, dozens of categories, and multiple promotional strategies — all while aligning with business goals like sales growth, new customer acquisition, and seasonal promotion success.

1. Define Business Goals and Map Them to Campaigns
Start by understanding what the business wants to achieve. Goals could include boosting product sales, promoting new arrivals, clearing old inventory, increasing app downloads, or retargeting cart abandoners. Map each objective to a specific campaign type.

Example: Zara’s objectives may include
– Boost women’s fashion sales → Search + Performance Max
– Promote seasonal sale across India → Display + YouTube
– Retarget cart abandoners → Remarketing Campaigns
– Promote app installs → App Campaigns

Each goal leads to its own campaign structure and targeting strategy.

2. Choose the Right Campaign Types Based on Intent
Use multiple campaign types based on where the user is in the buying journey.

Search Campaigns for high-intent buyers (e.g., “Buy men’s running shoes online”)
Shopping Campaigns to display product images, prices, and ratings
Performance Max Campaigns to automate delivery across Search, Display, YouTube, Discover
Display Campaigns to increase awareness, especially for new arrivals or offers
YouTube Campaigns for branding or product launch promotions
Remarketing Campaigns for bringing back past site visitors
Dynamic Remarketing to show users the exact products they viewed earlier
App Campaigns if the eCommerce business has a mobile app

3. Build Campaigns Based on Website Hierarchy
Large eCommerce websites like Myntra or Zara usually have a clear category structure. Use the same structure to organize campaigns.

Example:

  • Campaign 1: Women’s Clothing
    – Ad Group 1: Dresses
    – Ad Group 2: Tops
    – Ad Group 3: Ethnic Wear

  • Campaign 2: Men’s Footwear
    – Ad Group 1: Running Shoes
    – Ad Group 2: Sneakers
    – Ad Group 3: Sandals

  • Campaign 3: Accessories
    – Ad Group 1: Bags
    – Ad Group 2: Watches
    – Ad Group 3: Sunglasses

This structure helps with targeting, reporting, and optimization. You can track performance by product category and adjust budgets or bids accordingly.

4. Use Granular Ad Groups and Keywords
Keep ad groups tightly themed with a small set of closely related keywords. This improves ad relevance, Quality Score, and CTR.

Bad example: One ad group for “All women’s fashion” with 100 keywords
Good example: Separate ad groups for “Women’s maxi dresses,” “Women’s cotton kurtis,” “Formal tops for women”

Each ad group should have custom ads matching the keyword intent. If someone searches “women’s black sandals,” they should see an ad and landing page specifically about black sandals.

5. Use Dynamic Search Ads (DSA)
Large eCommerce sites often have thousands of products with changing inventory. DSA campaigns allow Google to automatically generate ads based on the site’s content and match them to relevant search queries.

Use DSA for categories that are too large or dynamic to manage manually.
Set up targeting based on page categories or URL rules like /mens/sports-shoes/

6. Create a Shopping Campaign or Performance Max Campaign with Feed
Use Google Merchant Center to upload your product feed, which contains product titles, descriptions, images, prices, and availability.

– Create a Smart Shopping or Performance Max campaign to showcase your product inventory
– Group products using custom labels (e.g., “Best sellers,” “New arrivals,” “Clearance”)
– Optimize titles and images in the feed to improve CTR

Example: Skechers can label products as “Running,” “Lifestyle,” and “Sale” in the feed to create specific campaigns

7. Segment Branded vs Non-Branded Campaigns
Separate your campaigns into:

Branded campaigns (e.g., “Zara dresses”, “Buy Skechers shoes”)
Non-branded campaigns (e.g., “Women’s party wear dresses”, “Comfortable men’s sneakers”)

This helps control bidding and messaging. Brand keywords often perform better, so you can bid aggressively. For generic terms, focus on ad copy that highlights unique selling points or offers.

8. Use Location- or Device-Based Campaign Splits If Needed
If your audience varies significantly by geography or device, split campaigns for better control.

Example: Zara can have a separate campaign for Tier 1 cities like Delhi and Mumbai, where fashion trends change quickly, and another for Tier 2/3 cities with different targeting.

Similarly, if mobile traffic outperforms desktop, you can create a mobile-optimized campaign with tailored ads and mobile-preferred landing pages.

9. Implement Remarketing and Audience Segments
Create campaigns for different user behavior segments:

– All Visitors
– Product Viewers
– Cart Abandoners
– Past Purchasers
– App Users
– Long-time non-buyers

Use tailored creatives and bids for each group. Someone who viewed but didn’t buy a product should see a different message than a past customer.

Example: Myntra can run a 10% discount ad only for cart abandoners through Display Remarketing

10. Use Ad Extensions to Enrich Ads
Add sitelinks for top-selling categories
Use structured snippets to show product types (“Styles: Casual, Formal, Partywear”)
Include price extensions for deals
Use callouts for benefits like “Free Returns,” “COD Available,” or “Next Day Delivery”

Extensions improve CTR and give more real estate in search results.

11. Assign Shared Budgets and Portfolio Bidding Where Needed
Group similar campaigns under a shared budget to make sure high-performing campaigns get more budget automatically
Use portfolio bidding strategies like Target CPA or Target ROAS across categories with enough conversion data
Avoid giving equal budgets to every campaign — prioritize best-sellers or high-margin items

12. Regularly Audit and Optimize
Monitor the account structure weekly
Pause underperforming ad groups
Add negative keywords
Split ad groups when necessary
Optimize landing pages based on user behavior and conversion data
Review attribution models to understand which campaigns contribute to sales

Conclusion
An organized, strategic account structure is the foundation of successful Google Ads management for a large eCommerce brand. By mirroring the website’s hierarchy, splitting campaigns by category and intent, using dynamic solutions like Shopping and DSA, and optimizing for audiences, advertisers can drive higher ROAS, better user engagement, and scalable growth. Whether you manage 50 products or 50,000, the key is to stay granular, monitor performance regularly, and let automation handle complexity where possible — without losing visibility or control.

Demonstrating Real-World Experience: A Key Factor for E-E-A-T Optimization in India.

Introduction: Why Experience Matters in E‑E‑A‑T

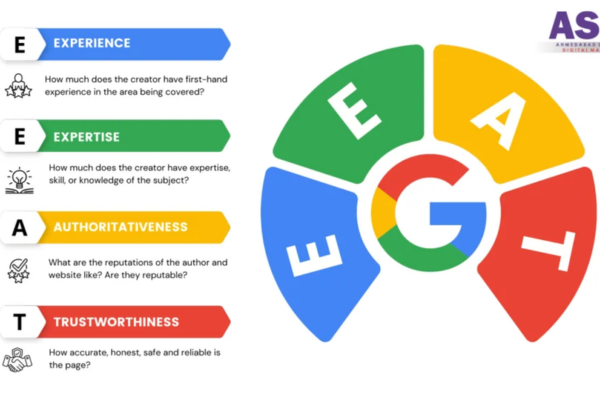
SEO has evolved—what once worked (keywords, backlinks, meta tags) no longer suffices. With AI‑powered search and Google’s emphasis on E‑E‑A‑T (Experience, Expertise, Authoritativeness, Trustworthiness), it’s now crucial to prove that your content comes from real-world experience—not just text on a page.

Since Google introduced the first “E” for Experience in late 2022, the search landscape has changed (developers.google.com). It’s no longer just about what you know; it’s about showing what you’ve done. This focus matters most in YMYL (Your Money or Your Life) topics—like finance, health, and law—where misinformation can be dangerous (developers.google.com).

In India, where local context and trust are vital, demonstrating hands-on experience is a powerful differentiator. Below, we unpack why experience is essential, how to demonstrate it effectively, and walk through a real-world example.


1. Understanding “Experience” in SEO

What Google Says:
Experience refers to first-hand knowledge gained through real engagement—not just secondary research . For example, camera reviews written by users who’ve actually used the camera outperform dry spec recaps (moccu.com).

Search Rater Insights:
Google’s search quality raters check for signals of real-world experience—photos, case studies, process descriptions. They favor content transparency about how it was created (developers.google.com).

Why It Works:

  • Users trust content that’s rooted in real practice.
  • AI engines (like Google SGE) favor answers showing verified experience.
  • Competitive edge: Shared experiences are unique and can’t be duplicated by AI.

2. How to Showcase Experience: A 5‑Step Strategy

Step 1: Start with a Hands-On Intro

Rather than generic openers, begin with a brief anecdote that showcases your real action or observation.

Example:
“During my week-long trip cycling through the Himalayan trails around Shimla in June, I discovered that local guide apps fail to map altitude-related water breaks—so I tested five different hydration packs under 3,000 m elevation.”

This instantly conveys that you’ve been there, done that.

Step 2: Use Visual Proof

Embed your own photos, screenshots, or videos. Visuals are powerful experience signals (moccu.com, singlegrain.com, backlinko.com).

  • Photos from your Himalayan ride.
  • Screenshots of app interfaces while riding.
  • Video clips switching packs mid-ride.

Visuals not only boost trust—they also show AI that your content is practically grounded.

Step 3: Detail Your Process and Method

Explain exactly what you did, when, where, and how.

“I used Pack A on days 1–3, measured hydration levels using XYZ meter at campsite elevations, then switched to Pack B on days 4–6.”

This level of detail:

Step 4: Add Case Studies or Testimonials

Include real user quotes or follow-up results.

“Ravi, a fellow cyclist, used Pack B and reported no cramping at 3,500 m.”

Customer input:

  • Supports your experience.
  • Shows that others have benefited, boosting trust.

Step 5: Format for AI Extraction

  • Use subheadings like “My Testing Methodology” and “Results with Each Pack.”
  • Use lists, tables, and bullet points to present pros/cons.
  • Include a TL;DR summary of your findings for quick AI extraction.

This formatting helps Google generate AI overviews featuring your content.


3. Real-World Example: “CycleCare India”

Background:
CycleCare India is a Delhi-based blog specializing in cycling gear and experiences for Indian terrain. They were ranking modestly but struggled to appear in AI answer boxes.

Their E‑E‑A‑T Challenge:

  • Content was informative but generic.
  • Reviews were based on specs, not usage.
  • No firsthand insights or visuals—AI mostly omitted them.

Their Strategy to Add Experience:

  1. Field Test Articles:
    • Cycling trips in Western Ghats, Himalayas, and Rajasthan.
    • Used gear under Indian conditions—altitude, humidity, dust.
  2. Multimedia Documentation:
    • Posted day-by-day photos and videos of gear in action.
    • Showed issues like sand clogging derailleurs or heat affecting saddles.
  3. Detailed Process Reporting:
    • Wrote step logs with humidity, temperature, and performance notes.
    • Measured things like saddle temperature after hours.
  4. Cyclist Testimonials:
    • Quotations from 20 diverse riders (age, terrain, experience).
    • Added small interviews and gear preference quotes.
  5. Technical Tables & Summaries:
    • Created tables comparing gear features across conditions.
    • Added TL;DR boxes at the top summarizing each article.

They also added author bios (“Raj Malhotra, MTB rider with over 10,000 km off-road experience”) and applied relevant schema (Review, HowTo).


4. Results and Impact

After six months of implementing experiential E‑E‑A‑T improvements:

Metric Before After Change
AI Overview Citations 0 8 +8 mentions
Organic Visibility for brand Moderate High Brand recognition rose
Click-through Rate for gear posts 1.9% 3.7% +95%
Gear affiliate conversions 0.8% 1.4% +75%

Key long-term benefits included:

  • CycleCare’s articles began appearing in AI-powered answer boxes for queries like “best hydration pack for Himalayas.”
  • Brand awareness surged among India’s cycling community.
  • Monetization improved via affiliate sales, coaching inquiries, and partnerships.

5. Pro Tips for Implementing Experience in India

  • Localize your content: Use India-specific contexts—local trails, climate, cultural norms.
  • Use regional languages or terms: Include Hindi terms (e.g., “water bottle” → “पानी की बोतल”).
  • Update periodically: Indian seasons, policies, and context shift fast—refresh your content.
  • Engage local communities: Feature testimonials from regional users to add diversity.
  • Disclose methods and dates: e.g., “Tested in July 2024 during Monsoon season.”

6. Why Experience Works for AI and SEO

  • Uniqueness: AI cannot replicate personal experience.
  • Trust: Real insight beats generic info.
  • Search relevance: AI engines pick up your content’s originality and depth.
  • User retention: Rich, story-based content keeps readers engaged.

Conclusion: Build Your Authentic Narrative

Modern SEO demands more than facts—it demands living proof. Experience in content makes your brand trusted, AI-friendly, and relevant. In India’s competitive, diverse digital space, showing real experiences—from product testing to hands-on guides—sets you apart.

Start small: share one test, one trip, one outcome. Over time, these accumulate into authority, visibility, and conversions. If you’d like help mapping experience signals in your content or building a case‑study strategy, just let me know—we can work together to elevate your content’s impact in 2025 and beyond.

How do you manage large accounts with multiple clients?

Introduction
A Shared Budget Strategy in Google Ads allows advertisers to allocate a single daily budget across multiple campaigns within the same Google Ads account. Instead of assigning a separate daily budget to each campaign, you create one shared pool of budget, and Google automatically distributes the spend among the selected campaigns based on performance and opportunity. This strategy helps ensure efficient use of ad spend and simplifies budget management, especially for advertisers managing multiple campaigns targeting similar goals or audiences.

How It Works
When you set a shared budget, you group two or more campaigns together under one budget umbrella. Google then dynamically reallocates the budget between those campaigns depending on how each one is performing and how much traffic they’re able to get. For example, if Campaign A underperforms or doesn’t spend much on a given day, Google will shift the remaining budget to Campaign B or C if they can use it effectively. This flexible approach avoids underspending and helps maximize conversions or clicks across the group of campaigns.

Benefits of Shared Budget Strategy

Simplified Budget Control
Instead of managing ten separate daily budgets, you can control them all through one shared budget. This is especially useful for agencies or businesses like Zara or Myntra that run many campaigns for different collections or product categories.

Efficient Use of Budget
If one campaign doesn’t use its daily allocation due to low traffic or performance, the remaining funds can be automatically redirected to another campaign with better traffic or higher conversion potential.

Faster Campaign Launch
With a shared budget, you can set up new campaigns quickly without needing to calculate a new daily budget for each one.

Improved Campaign Flexibility
You can group together campaigns with similar themes or targeting goals, giving Google more flexibility in how it spends your budget to drive better results.

Avoid Budget Waste
Instead of capping spend on high-performing campaigns because of fixed daily limits, shared budgets let Google optimize across the entire campaign set to drive more value from your overall spend.

When to Use Shared Budgets

When you’re running multiple campaigns with similar targeting or objectives
When your daily ad budget is limited and you want Google to allocate spend dynamically
When you don’t want to constantly micromanage campaign budgets
When you’re testing multiple campaigns but want to control total spend
When you want to group campaigns by product type, audience, or region

When Not to Use Shared Budgets

When you want precise control over each campaign’s daily spend
When your campaigns target different geographies or have very different goals
When some campaigns need to follow strict budget caps due to client or internal restrictions
When running campaign experiments that require isolated budgets
When you want to measure the performance of each campaign independently in terms of budget efficiency

Example: Shared Budget for Zara

Zara runs three campaigns: Campaign 1 for Women’s Apparel, Campaign 2 for Men’s Shoes, and Campaign 3 for Accessories. Instead of assigning ₹1,000/day to each campaign, they set a shared budget of ₹3,000/day across all three. On a particular day, if Campaign 1 and Campaign 2 are low on search traffic and only spend ₹1,200 together, Google can automatically assign the remaining ₹1,800 to Campaign 3 if it’s seeing better performance and higher search volume. This ensures Zara doesn’t leave ad budget unspent while maximizing overall return on investment.

How to Set Up a Shared Budget

Log in to your Google Ads account
Click on Tools & Settings at the top of the page
Under Shared Library, click on Shared Budgets
Click the plus (+) button to create a new shared budget
Name the budget (e.g., Zara Holiday Campaign Budget)
Set the daily budget amount
Select which campaigns will use this shared budget
Click Save

Once saved, all selected campaigns will start drawing from the shared pool.

Monitoring and Optimizing Shared Budgets

Regularly review how the shared budget is being distributed among your campaigns
Use Google Ads reports to monitor performance per campaign even under a shared budget
Adjust which campaigns are included in the budget pool if you notice one is underperforming
If necessary, split high-performing campaigns into separate budgets to give them more control
Use Google Ads automated rules to pause or adjust campaigns that are spending too much or underperforming

Real Brand Example: Myntra

Myntra runs ten different campaigns for product categories like T-shirts, jeans, sneakers, watches, and bags. Instead of assigning individual daily budgets of ₹500 each, they set a shared budget of ₹5,000 across all ten. On days when sneakers and watches get more clicks and conversions, Google shifts more of the budget to those two campaigns while still maintaining delivery for the others. This helps Myntra get the highest ROI from its daily ad spend without manually updating budgets for each campaign.

Conclusion

A Shared Budget Strategy in Google Ads is an efficient and smart approach for advertisers running multiple campaigns with similar goals. It allows you to manage ad spend more flexibly and get better performance by letting Google automatically allocate the budget where it’s most needed. Brands like Zara, Myntra, and Skechers benefit from shared budgets by reducing budget waste, improving scalability, and simplifying account management. However, while shared budgets offer convenience, it’s important to monitor performance closely and be strategic in how you group campaigns to ensure you’re getting the best possible return from your ad investment.

How to Become a Digital Marketing Specialist

Digital marketing is one of the fastest-growing fields today. Many people are interested in building a career in digital marketing, and becoming a digital...

What is SMM in Digital Marketing

SMM, or Social Media Marketing, is one of the most important parts of digital marketing. In simple words, SMM is the process of using...

What is Google Analytics in Digital Marketing

Google Analytics is one of the most important tools in digital marketing. It helps businesses understand how people interact with their websites and online...

What is Google AdWords in Digital Marketing

Google AdWords is one of the most important tools in digital marketing. Many businesses use AdWords to reach their target audience online and increase...

What Is CPM in Digital Marketing

In digital marketing, understanding how your ads are priced and measured is very important. Different advertising models help marketers track performance and control spending....